
Introduction to Vanilla Pear Upside-Down Cake
Hey there, fellow home cooks! If you’re anything like me, you know that life can get a bit hectic, especially when juggling family, work, and everything in between. That’s why I’m excited to share my Vanilla Pear Upside-Down Cake recipe with you. It’s not just a dessert; it’s a delightful way to bring a little sweetness into your busy life. This cake is simple to whip up, yet it looks and tastes like a showstopper. Perfect for impressing guests or just treating yourself after a long day, this cake is sure to become a favorite in your home!
Why You’ll Love This Vanilla Pear Upside-Down Cake
This Vanilla Pear Upside-Down Cake is a dream come true for busy women like us! It’s quick to prepare, taking just about 15 minutes of hands-on time. The combination of sweet, juicy pears and a moist cake is simply irresistible. Plus, it’s a one-pan wonder, which means less cleanup for you. Whether it’s a family gathering or a cozy night in, this cake is sure to impress without the stress!
Ingredients for Vanilla Pear Upside-Down Cake
Let’s dive into the delicious components that make up this Vanilla Pear Upside-Down Cake. Each ingredient plays a vital role in creating that perfect balance of flavors and textures. Here’s what you’ll need:
- Pears: Ripe, juicy pears are the star of this cake. They add natural sweetness and moisture. Feel free to use any variety you love, like Bartlett or Bosc!
- Unsalted Butter: This adds richness and flavor to the cake. Using unsalted butter allows you to control the saltiness of your dessert.
- Brown Sugar: Packed brown sugar gives a lovely caramel flavor to the topping, enhancing the sweetness of the pears.
- Ground Cinnamon: A warm spice that complements the pears beautifully. It adds a cozy aroma that fills your kitchen while baking.
- All-Purpose Flour: The base of the cake, providing structure. You can substitute with gluten-free flour if needed!
- Baking Powder: This leavening agent helps the cake rise, making it light and fluffy.
- Baking Soda: Works alongside the baking powder to ensure a perfect rise. It also helps with browning.
- Salt: Just a pinch enhances all the flavors in the cake, balancing the sweetness.
- Granulated Sugar: This sweetens the cake batter and contributes to its lovely texture.
- Eggs: They bind the ingredients together and add moisture. They also help the cake rise.
- Vanilla Extract: A must-have for flavor! It adds a lovely aroma and enhances the sweetness of the cake.
- Buttermilk: This adds moisture and a slight tang, making the cake tender. If you don’t have buttermilk, you can make a quick substitute by mixing milk with a splash of vinegar or lemon juice.
For those who want to get a little creative, consider adding chopped walnuts or pecans for a delightful crunch. You can also swap out the pears for apples or peaches if you’re in the mood for a different fruity twist. Remember, the exact quantities for each ingredient are listed at the bottom of the article for your convenience!
How to Make Vanilla Pear Upside-Down Cake
Now that we have our ingredients ready, let’s get into the fun part—making this delightful Vanilla Pear Upside-Down Cake! Follow these simple steps, and you’ll have a beautiful dessert that’s sure to impress.
Step 1: Preheat and Prepare
First things first, preheat your oven to 350°F (175°C). This ensures your cake bakes evenly. While that’s heating up, grab a 9-inch round cake pan and grease it with about 1 tablespoon of unsalted butter. This will help the cake release easily later. Trust me, you don’t want to lose any of that delicious topping!
Step 2: Create the Topping
In a small saucepan over medium heat, melt 1/4 cup of butter. Once it’s melted, stir in the packed brown sugar and ground cinnamon until everything is well combined. This mixture will create a lovely caramel-like topping for your cake. Pour this sweet concoction into the bottom of your prepared cake pan, spreading it out evenly. Your kitchen will start to smell heavenly at this point!
Step 3: Arrange the Pears
Now, it’s time to bring in the star of the show—those juicy pears! Take your peeled and sliced pears and arrange them evenly over the brown sugar mixture in the pan. You can get creative here; overlapping them slightly can create a beautiful pattern. Just make sure they’re spread out nicely so every slice gets a taste of that pear goodness!
Step 4: Mix Dry Ingredients
In a medium bowl, whisk together the all-purpose flour, baking powder, baking soda, and salt. This step is crucial as it ensures that your leavening agents are evenly distributed throughout the flour. It’s a simple step, but it makes a big difference in the texture of your Vanilla Pear Upside-Down Cake!
Step 5: Cream Butter and Sugar
In a large mixing bowl, cream together the remaining 1/4 cup of unsalted butter and granulated sugar until the mixture is light and fluffy. This usually takes about 3-5 minutes. Next, add the eggs one at a time, mixing well after each addition. Finally, stir in the vanilla extract. This step is where the magic happens, as the butter and sugar create a lovely base for your cake!
Step 6: Combine Wet and Dry Ingredients
Now, it’s time to bring everything together! Gradually add the dry ingredients to the wet mixture, alternating with the buttermilk. Start and end with the flour mixture, mixing until just combined. Be careful not to overmix; we want a tender cake, not a tough one. This is where the flavors meld together beautifully!
Step 7: Pour and Bake
Pour the batter over the arranged pears in the cake pan, spreading it out evenly. This batter will rise and envelop the pears as it bakes, creating that stunning upside-down effect. Pop it in the preheated oven and bake for 35-40 minutes, or until a toothpick inserted into the center comes out clean. Your kitchen will smell divine!
Step 8: Invert and Cool
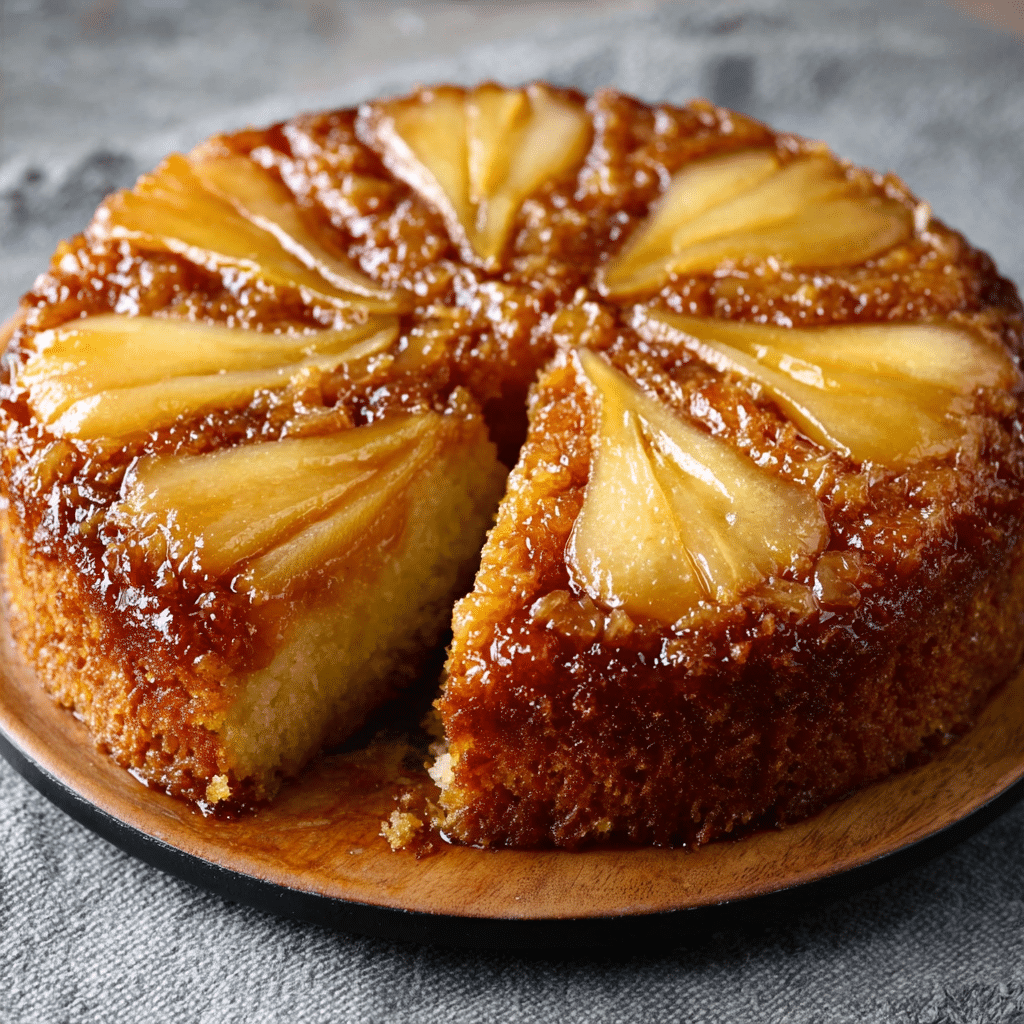
Once the cake is done baking, let it cool in the pan for about 10 minutes. This cooling time is essential for the cake to set. After that, carefully invert the cake onto a serving plate, allowing the pears to be on top. Let it cool slightly before slicing. You’ll want to savor that moment when you reveal the beautiful pear topping!
Tips for Success
- Make sure your pears are ripe for the best flavor and texture.
- Don’t skip the cooling time before inverting the cake; it helps maintain its shape.
- Use room temperature ingredients for better mixing and a fluffier cake.
- Feel free to experiment with spices like nutmeg or ginger for a unique twist.
- Store leftovers in an airtight container to keep the cake moist.
Equipment Needed
- 9-inch Round Cake Pan: A standard size for this recipe. If you don’t have one, an 8-inch pan works too, but adjust baking time.
- Mixing Bowls: Use a large bowl for wet ingredients and a medium bowl for dry. Any size will do!
- Whisk: Perfect for mixing dry ingredients. A fork can work in a pinch!
- Spatula: Great for spreading the batter evenly. A wooden spoon is a good alternative.
- Small Saucepan: Needed for melting butter. A microwave-safe bowl can also do the trick!
Variations
- Nutty Delight: Add chopped walnuts or pecans over the pears before pouring the batter for a delightful crunch and added flavor.
- Fruit Swap: Substitute pears with apples, peaches, or even plums for a different fruity twist that still delivers on taste.
- Spice It Up: Experiment with spices like nutmeg or ginger to give your cake a warm, cozy flavor profile.
- Gluten-Free Option: Use a gluten-free all-purpose flour blend to make this cake suitable for those with gluten sensitivities.
- Dairy-Free Version: Replace buttermilk with almond milk mixed with a splash of vinegar and use dairy-free butter for a delicious dairy-free treat.
Serving Suggestions
- Whipped Cream: A dollop of freshly whipped cream on top adds a light, airy touch.
- Vanilla Ice Cream: Serve warm slices with a scoop of vanilla ice cream for a delightful contrast.
- Tea or Coffee: Pair with a cup of your favorite tea or coffee for a cozy dessert experience.
- Garnish: Sprinkle with powdered sugar or a few mint leaves for a beautiful presentation.
FAQs about Vanilla Pear Upside-Down Cake
As you embark on your baking adventure with this Vanilla Pear Upside-Down Cake, you might have a few questions. Don’t worry; I’ve got you covered! Here are some common queries that pop up, along with helpful answers to guide you along the way.
1. Can I use other fruits instead of pears?
Absolutely! While pears are the star of this Vanilla Pear Upside-Down Cake, you can easily swap them out for other fruits. Apples, peaches, or even plums work wonderfully. Just make sure to choose fruits that are ripe and juicy for the best flavor!
2. How do I store leftovers?
To keep your cake fresh, store any leftovers in an airtight container at room temperature for up to three days. If you want to keep it longer, you can refrigerate it for about a week. Just remember to let it come to room temperature before serving for the best taste!
3. Can I make this cake ahead of time?
Yes, you can! This Vanilla Pear Upside-Down Cake actually tastes even better the next day as the flavors meld together. Just bake it, let it cool completely, and then store it in an airtight container. When you’re ready to serve, you can warm it up slightly in the oven or microwave.
4. What can I do if my cake sticks to the pan?
If your cake sticks, don’t panic! It happens to the best of us. Make sure to grease your pan well with butter and consider lining the bottom with parchment paper for extra insurance. If it still sticks, gently run a knife around the edges to loosen it before inverting.
5. Can I freeze the Vanilla Pear Upside-Down Cake?
Yes, you can freeze this cake! Wrap it tightly in plastic wrap and then in aluminum foil to prevent freezer burn. It can be frozen for up to three months. When you’re ready to enjoy it, simply thaw it in the refrigerator overnight and warm it up before serving.
Final Thoughts
There’s something truly special about baking a Vanilla Pear Upside-Down Cake. It’s not just about the delicious flavors or the beautiful presentation; it’s about the joy it brings to your home. Picture the smiles on your loved ones’ faces as they take that first bite, savoring the sweet, tender pears and moist cake. This recipe is a reminder that even on the busiest days, we can create moments of sweetness and connection. So, roll up your sleeves, embrace the process, and let this delightful cake become a cherished part of your family’s dessert tradition!
PrintVanilla Pear Upside-Down Cake: A Delicious Dessert Idea!
A delicious Vanilla Pear Upside-Down Cake that combines the sweetness of pears with a moist cake base.
- Total Time: 55 minutes
- Yield: 8 servings 1x
Ingredients
- 3 medium ripe pears, peeled, cored, and sliced
- 1/2 cup unsalted butter, divided
- 1/2 cup brown sugar, packed
- 1 teaspoon ground cinnamon
- 1 1/2 cups all-purpose flour
- 1 teaspoon baking powder
- 1/2 teaspoon baking soda
- 1/4 teaspoon salt
- 1 cup granulated sugar
- 2 large eggs
- 2 teaspoons vanilla extract
- 1/2 cup buttermilk
Instructions
- Preheat your oven to 350°F (175°C). Grease a 9-inch round cake pan with 1 tablespoon of butter and set aside.
- In a small saucepan over medium heat, melt 1/4 cup of butter. Stir in the brown sugar and cinnamon until combined. Pour this mixture into the bottom of the prepared cake pan.
- Arrange the sliced pears evenly over the brown sugar mixture in the pan.
- In a medium bowl, whisk together the flour, baking powder, baking soda, and salt. Set aside.
- In a large mixing bowl, cream together the remaining 1/4 cup of butter and granulated sugar until light and fluffy. Add the eggs one at a time, mixing well after each addition. Stir in the vanilla extract.
- Gradually add the dry ingredients to the wet mixture, alternating with the buttermilk. Begin and end with the flour mixture, mixing until just combined.
- Pour the batter over the arranged pears in the cake pan, spreading it evenly.
- Bake for 35-40 minutes, or until a toothpick inserted into the center comes out clean. Let the cake cool in the pan for 10 minutes.
- Carefully invert the cake onto a serving plate, allowing the pears to be on top. Let it cool slightly before slicing.
Notes
- For added flavor, sprinkle chopped walnuts or pecans over the pears before adding the batter.
- Substitute the pears with sliced apples or peaches for a different fruit twist.
- Prep Time: 15 minutes
- Cook Time: 40 minutes
- Category: Dessert
- Method: Baking
- Cuisine: American
- Diet: Vegetarian
Nutrition
- Serving Size: 1 slice
- Calories: 240
- Sugar: 34g
- Sodium: Not specified
- Fat: 10g
- Saturated Fat: Not specified
- Unsaturated Fat: Not specified
- Trans Fat: Not specified
- Carbohydrates: 34g
- Fiber: Not specified
- Protein: 3g
- Cholesterol: Not specified