

Introduction to Santa Claus Macarons
Ah, the holiday season! It’s that magical time of year when we gather with loved ones, share laughter, and indulge in delightful treats. If you’re like me, you want to impress your family and friends without spending all day in the kitchen. That’s where these adorable Santa Claus Macarons come in! They’re not just a feast for the eyes; they’re a quick solution for a busy day, perfect for festive celebrations. With their charming Santa faces and delicious white chocolate filling, these macarons will surely bring smiles to everyone’s faces. Let’s dive into this fun and festive recipe!
Why You’ll Love This Santa Claus Macarons
These Santa Claus Macarons are not only a treat for the taste buds but also a feast for the eyes! They’re surprisingly easy to make, even for those of us who juggle busy schedules. With just a handful of ingredients and a bit of patience, you can whip up these festive delights in no time. Plus, their delightful flavor and whimsical appearance will surely impress your family and friends, making your holiday gatherings even more special!
Ingredients for Santa Claus Macarons
Before we get our hands dirty, let’s gather our ingredients for these delightful Santa Claus Macarons. Each component plays a vital role in creating that perfect texture and flavor. Here’s what you’ll need:
- Powdered Sugar: This sweet, fine sugar gives the macarons their signature sweetness and helps create a smooth texture.
- Almond Flour: The star of the show! Almond flour provides that lovely nutty flavor and contributes to the chewy texture we all adore in macarons.
- Egg Whites: These are essential for achieving the light and airy structure of the macarons. Make sure they’re at room temperature for the best results!
- Granulated Sugar: This sugar is added to the egg whites to stabilize them while whipping, ensuring those beautiful stiff peaks.
- Vanilla Extract: A splash of this adds a warm, comforting flavor that complements the sweetness of the macarons.
- Red Gel Food Coloring: This is what gives our macarons that festive Santa red hue! Gel coloring is preferred as it doesn’t alter the batter’s consistency.
- White Chocolate: Chopped into pieces, this will be the creamy filling that brings everything together. It’s rich and pairs perfectly with the almond flavor.
- Heavy Cream: Used to make the ganache, it adds a luscious texture and helps the chocolate melt beautifully.
Feel free to get creative! You can add a sprinkle of edible glitter for a festive touch or even a hint of peppermint extract in the ganache for a holiday twist. If you want to make Santa’s face pop, consider using black icing for the eyes and a small piece of red candy for the nose. Remember, the exact quantities for these ingredients are listed at the bottom of the article, ready for you to print out and take to the kitchen!
How to Make Santa Claus Macarons
Now that we have our ingredients ready, let’s roll up our sleeves and get started on making these delightful Santa Claus Macarons. I promise, it’s easier than it looks! Just follow these simple steps, and you’ll be on your way to creating festive treats that will wow your family and friends.
Step 1: Prepare the Dry Ingredients
First things first, let’s sift together our dry ingredients. In a large bowl, combine the powdered sugar and almond flour. Sifting is crucial here; it helps eliminate any lumps and ensures a smooth macaron shell. Think of it as giving your ingredients a little spa treatment! Once sifted, set this mixture aside while we move on to the next step.
Step 2: Whip the Egg Whites
Next, grab a clean mixing bowl and add your egg whites. Make sure they’re at room temperature; this helps them whip up beautifully! Using an electric mixer, whip the egg whites on medium speed until they become foamy. It’s like watching a cloud form! Gradually add the granulated sugar, a spoonful at a time, while continuing to whip. Keep going until you reach stiff peaks. This means when you lift the beaters, the egg whites should stand tall and proud, not drooping over like a sad pancake.
Step 3: Combine and Color the Mixture
Now it’s time to bring our mixtures together! Gently fold the almond flour mixture into the whipped egg whites in three additions. Use a spatula and be careful not to deflate the egg whites. We want to keep that airy texture! Once combined, add a few drops of red gel food coloring. Mix until you achieve a vibrant Santa red. It’s like painting a masterpiece, but edible!
Step 4: Pipe the Macarons
Let’s get piping! Transfer your macaron batter into a piping bag fitted with a round tip. If you don’t have a piping bag, a zip-top bag with a corner snipped off works just as well. Line two baking sheets with parchment paper. Pipe 1.5-inch circles onto the sheets, leaving some space between each one. Think of them as little Santa faces waiting to be decorated! Once piped, tap the baking sheets gently on the counter to release any air bubbles. This step is key to getting those lovely feet on your macarons!
Step 5: Bake the Macarons
Now, let’s give our macarons some time to rest. Allow them to sit at room temperature for 30-60 minutes, or until a skin forms on the surface. This is crucial for achieving that perfect texture. While they’re resting, preheat your oven to 300°F. Once ready, bake the macarons for 15-20 minutes. You’ll know they’re done when they’ve risen and developed those adorable feet. Your kitchen will smell heavenly, and you’ll be one step closer to holiday magic!
Step 6: Make the White Chocolate Ganache
While the macarons cool, let’s whip up the filling! In a small saucepan, heat the heavy cream over medium heat until it’s just simmering. Pour the hot cream over the chopped white chocolate in a bowl and let it sit for a minute. This allows the chocolate to melt beautifully. After a minute, stir until smooth and glossy. Let the ganache cool to room temperature. It should be thick but still spreadable, like a cozy blanket on a chilly day!
Step 7: Assemble the Macarons
Once your macarons are completely cool, it’s time to assemble! Pair them up by size—this will help create perfect sandwiches. Pipe a small amount of the white chocolate ganache onto the flat side of one macaron and gently sandwich it with its partner. You can even get creative and add a sprinkle of edible glitter or use black icing for Santa’s eyes and a red candy for his nose. These little touches will make your Santa Claus Macarons truly festive!

Tips for Success
- Make sure your mixing bowls and utensils are completely clean and dry; any grease can prevent the egg whites from whipping properly.
- Use a kitchen scale for precise measurements, especially for the almond flour and powdered sugar.
- Don’t rush the resting time before baking; it’s essential for achieving that perfect macaron texture.
- Experiment with different colors and decorations to make your Santa Claus Macarons uniquely yours!
- Practice makes perfect! Don’t be discouraged if your first batch isn’t flawless.
Equipment Needed
- Mixing Bowls: Use glass or stainless steel for best results; plastic can retain grease.
- Electric Mixer: A hand mixer works fine, but a stand mixer makes it easier.
- Piping Bag: If you don’t have one, a zip-top bag with a corner cut works great!
- Parchment Paper: Essential for lining baking sheets; silicone mats are a reusable alternative.
- Spatula: A silicone spatula is perfect for folding the batter gently.
Variations
- Peppermint Twist: Add a few drops of peppermint extract to the white chocolate ganache for a refreshing holiday flavor.
- Chocolate Macarons: Substitute half of the almond flour with cocoa powder for a rich chocolate version of your Santa Claus Macarons.
- Nut-Free Option: Use sunflower seed flour instead of almond flour for a nut-free alternative that still delivers on taste.
- Vegan Version: Replace egg whites with aquafaba (the liquid from canned chickpeas) and use dairy-free chocolate for the ganache.
- Colorful Santas: Experiment with different gel food colors to create a rainbow of festive macarons, perfect for any holiday gathering!
Serving Suggestions
- Hot Cocoa: Pair your Santa Claus Macarons with a warm cup of hot cocoa for a cozy treat.
- Festive Platter: Arrange the macarons on a decorative platter with holiday-themed decorations for a stunning presentation.
- Tea or Coffee: Serve alongside your favorite tea or coffee for a delightful afternoon snack.
- Gift Boxes: Package them in cute boxes as homemade gifts for friends and family.
FAQs about Santa Claus Macarons
As you embark on your journey to create these delightful Santa Claus Macarons, you might have a few questions. Don’t worry; I’ve got you covered! Here are some common queries that pop up when making these festive treats:
1. Can I make Santa Claus Macarons ahead of time?
Absolutely! You can prepare the macaron shells a day in advance and store them in an airtight container in the refrigerator. Just make sure to fill them with the ganache right before serving to keep them fresh and delicious!
2. What should I do if my macarons don’t have feet?
No feet? No problem! This can happen if the batter is too wet or if they didn’t rest long enough before baking. Make sure to let them sit until a skin forms on the surface, and check your oven temperature for accuracy. A little practice goes a long way!
3. Can I use different colors for my Santa Claus Macarons?
Of course! While red is traditional, feel free to get creative with colors. You can make blue, green, or even rainbow Santas! Just remember to use gel food coloring to maintain the right batter consistency.
4. How do I store leftover macarons?
Store your Santa Claus Macarons in an airtight container in the refrigerator for up to five days. Allow them to come to room temperature before serving for the best flavor and texture. They’re so good, they might not last that long anyway!
5. Can I make these macarons gluten-free?
Yes! The main ingredient, almond flour, is naturally gluten-free, making these Santa Claus Macarons a great option for those with gluten sensitivities. Just double-check that your other ingredients are also gluten-free to keep everything safe!
Final Thoughts
Making Santa Claus Macarons is more than just baking; it’s about creating joyful moments with family and friends during the holiday season. The smiles on their faces as they bite into these delightful treats are priceless! Whether you’re a seasoned baker or just starting, this recipe offers a fun and festive way to celebrate. Plus, the process of crafting these charming little Santas can be a wonderful stress reliever amidst the holiday hustle. So, roll up your sleeves, embrace the holiday spirit, and let these macarons bring a sprinkle of magic to your celebrations!
Print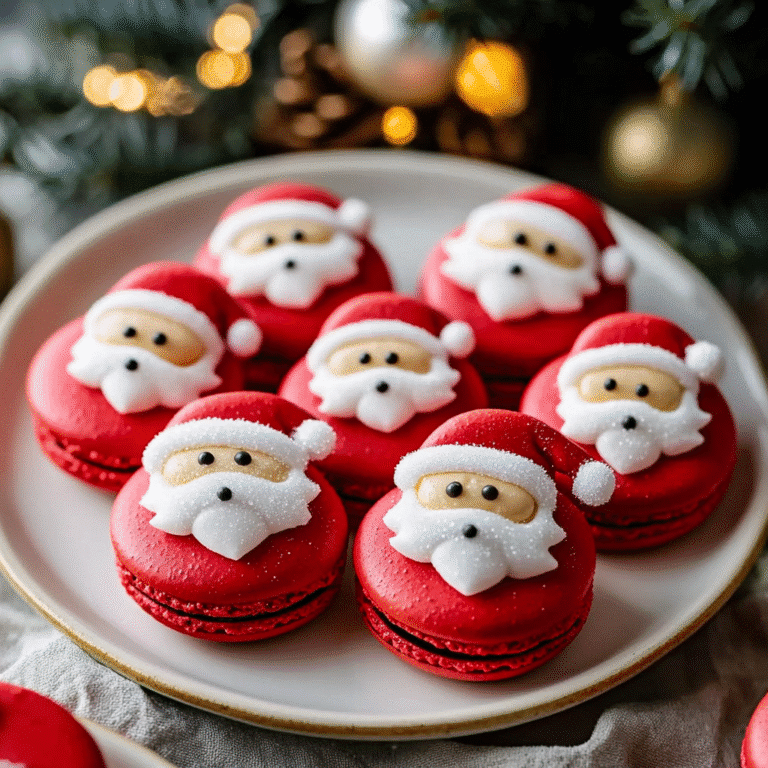
Santa Claus Macarons: Delightful Holiday Treats Awaits!
Delightful holiday treats shaped like Santa Claus, perfect for festive celebrations.
- Total Time: 50 minutes
- Yield: 24 macarons (12 sandwiches) 1x
Ingredients
- 1 ½ cups powdered sugar
- 1 cup almond flour
- ½ cup egg whites (about 4 large eggs)
- ¼ cup granulated sugar
- ½ teaspoon vanilla extract
- Red gel food coloring
- 4 ounces white chocolate, chopped (for filling)
- ¼ cup heavy cream (for filling)
Instructions
- Sift together the powdered sugar and almond flour in a bowl and set aside.
- In a separate bowl, whip the egg whites until foamy.
- Gradually add the granulated sugar and continue to whip until stiff peaks form.
- Mix in the vanilla extract and a few drops of red gel food coloring until the desired shade of red is achieved.
- Gently fold the almond flour mixture into the egg whites in three additions, being careful not to deflate the mixture.
- Transfer the batter to a piping bag fitted with a round tip.
- Line two baking sheets with parchment paper and pipe 1.5-inch circles onto the sheets, leaving space between each macaron.
- Tap the baking sheets on the counter to release any air bubbles and let the macarons sit at room temperature for 30-60 minutes, or until a skin forms on the surface.
- Preheat the oven to 300°F and bake the macarons for 15-20 minutes, or until they have risen and developed feet.
- Allow the macarons to cool completely on the baking sheets.
- For the ganache, heat the heavy cream in a small saucepan until just simmering.
- Pour the cream over the chopped white chocolate and let it sit for a minute, then stir until smooth and let it cool to room temperature.
- Once the macarons are cool, pair them up by size.
- Pipe a small amount of white chocolate ganache onto the flat side of one macaron and sandwich it with its pair.
- Serve immediately or store in an airtight container in the refrigerator for up to 5 days, allowing them to come to room temperature before serving.
Notes
- Consider adding a sprinkle of edible glitter for a festive touch.
- Using peppermint extract in the ganache adds a holiday twist.
- You can create a Santa face using black icing for the eyes and a small piece of red candy for the nose.
- Prep Time: 30 minutes
- Cook Time: 20 minutes
- Category: Dessert
- Method: Baking
- Cuisine: French
- Diet: Vegetarian
Nutrition
- Serving Size: 1 macaron
- Calories: 100
- Sugar: 0g
- Sodium: 0mg
- Fat: 6g
- Saturated Fat: 0g
- Unsaturated Fat: 0g
- Trans Fat: 0g
- Carbohydrates: 9g
- Fiber: 0g
- Protein: 1g
- Cholesterol: 0mg