
Introduction to Rich Cheesecake
Ah, the joy of a Rich Cheesecake! It’s like a warm hug on a plate, isn’t it? I can’t tell you how many times I’ve turned to this classic recipe when I need something special but don’t have hours to spend in the kitchen. Whether it’s a family gathering, a potluck, or just a cozy night in, this cheesecake is the perfect solution. It’s creamy, velvety, and oh-so-delicious, making it a surefire way to impress your loved ones. Plus, it’s surprisingly easy to whip up, even on those busy days when time feels like it’s slipping away!
Why You’ll Love This Rich Cheesecake
This Rich Cheesecake is a game-changer for busy women like us! It’s not just about the taste—though, trust me, it’s heavenly. The ease of preparation means you can have a stunning dessert ready in no time. Plus, it’s versatile enough to suit any occasion, from birthdays to casual dinners. And let’s be honest, who doesn’t love a dessert that feels indulgent but is surprisingly simple to make? You’ll be the star of the show!
Ingredients for Rich Cheesecake
Let’s dive into the delicious world of ingredients that make this Rich Cheesecake a true delight! Each component plays a vital role in creating that creamy, dreamy texture we all crave. Here’s what you’ll need:
- Crushed Digestive Biscuits: These provide a buttery, crunchy base for your cheesecake. You can substitute with graham crackers if you prefer a different flavor.
- White Sugar: This sweetens the crust and filling, balancing the richness of the cream cheese. Feel free to use coconut sugar or a sugar substitute if you’re watching your intake.
- Melted Unsalted Butter: This binds the crust together and adds richness. If you want a lighter option, you can use coconut oil instead.
- Softened Cream Cheese: The star of the show! It gives the cheesecake its signature creamy texture. Make sure it’s at room temperature for easy mixing.
- Vanilla Extract: A splash of this adds warmth and depth to the flavor. Pure vanilla is best, but imitation works in a pinch.
- Large Eggs: These help set the cheesecake and give it that luscious texture. Room temperature eggs mix in more smoothly.
- Heavy Cream: This adds a luxurious creaminess to the filling. If you’re looking for a lighter version, you can use half-and-half.
- All-Purpose Flour: Just a tablespoon helps stabilize the cheesecake, ensuring it holds its shape. You can skip this if you’re gluten-free or use a gluten-free flour blend.
For exact measurements, check the bottom of the article where you can find everything listed for easy printing. Now that you know what goes into this Rich Cheesecake, let’s get ready to create something truly special!
How to Make Rich Cheesecake
Now that we have our ingredients ready, let’s dive into the fun part—making this Rich Cheesecake! I promise, it’s easier than you might think. Just follow these simple steps, and you’ll have a dessert that will make everyone swoon.
Step 1: Preheat the Oven
First things first, preheat your oven to 325°F (163°C). This is crucial for getting that perfect bake. While the oven warms up, grab your 9-inch springform pan and grease it with butter or non-stick spray. This will help your cheesecake slide out easily later on. Trust me, you don’t want to be wrestling with a stuck cheesecake!
Step 2: Prepare the Crust
In a mixing bowl, combine the crushed digestive biscuits, 1/2 cup of sugar, and melted butter. Stir it all together until the mixture resembles wet sand. It should hold together when you squeeze it in your hand. Now, firmly press this mixture into the bottom of your springform pan. Make sure it’s nice and even; this crust is the foundation of your Rich Cheesecake!
Step 3: Make the Filling
In a separate large bowl, use an electric mixer to beat the softened cream cheese until it’s smooth and creamy—about 2-3 minutes should do the trick. Gradually mix in 1 cup of sugar and the vanilla extract until everything is well blended. Now, here’s a little tip: add the eggs one at a time, mixing on low speed just until each egg is combined. Overmixing can lead to cracks, and we want a smooth surface! Once the eggs are in, carefully fold in the heavy cream and flour until the batter is uniform. It should look rich and luscious—just like a good cheesecake should!
Step 4: Bake the Cheesecake
Now it’s time to pour that heavenly cheesecake mixture over the prepared crust. Spread it out evenly, and then pop it in the oven. Bake for approximately 55-60 minutes. You’ll know it’s done when the edges are firm, but the center still has a slight wobble. This wobble is a good sign; it means your cheesecake will be creamy and not overcooked!
Step 5: Cool and Refrigerate
Once baked, turn off the oven and let the cheesecake sit inside for an hour to cool slowly. This step is key to preventing cracks. After that, take it out and let it reach room temperature. Then, refrigerate it for at least 4 hours, or overnight if you can wait! The longer it chills, the better the texture will be. Trust me, the anticipation will be worth it when you finally slice into that velvety Rich Cheesecake!
Tips for Success
- Make sure your cream cheese is at room temperature for easy mixing—no one likes lumps!
- Don’t skip the cooling step in the oven; it helps prevent cracks.
- Use a water bath for extra moisture while baking, if you’re feeling fancy!
- For a smoother texture, blend the filling until just combined—overmixing can lead to a dense cheesecake.
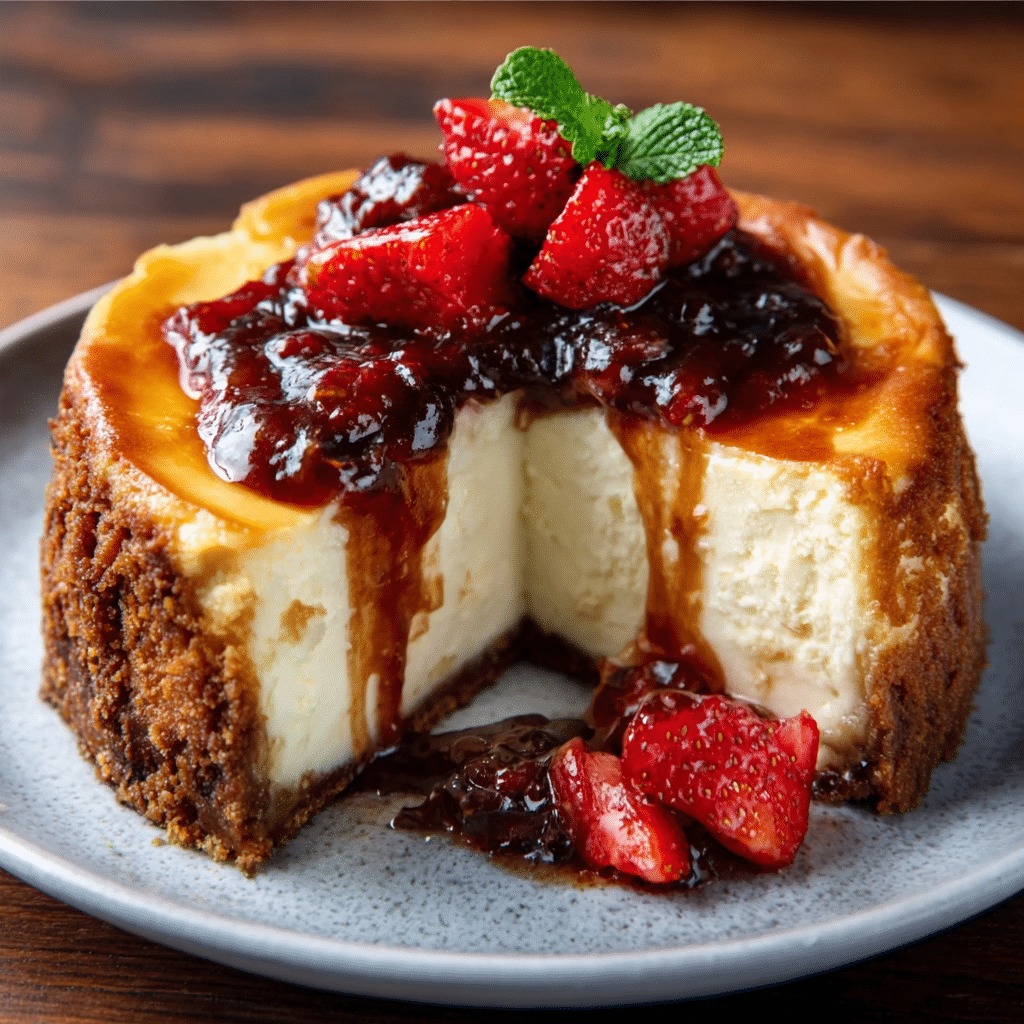
- Garnish with fresh fruit or chocolate for a beautiful presentation!
Equipment Needed
- 9-inch Springform Pan: Essential for easy removal. A regular cake pan works too, but it may be trickier to serve.
- Electric Mixer: For smooth filling. A whisk can work, but it’ll take more elbow grease!
- Mixing Bowls: Have a couple on hand for easy prep.
- Spatula: Perfect for folding in ingredients and scraping the bowl clean.
Variations
- Fruit-Infused Cheesecake: Add pureed strawberries, blueberries, or raspberries to the filling for a fruity twist. Just fold in about a cup of your favorite fruit puree before pouring it over the crust.
- Chocolate Lover’s Delight: Mix in melted chocolate or cocoa powder into the filling for a rich chocolate cheesecake. You can also top it with chocolate ganache for an extra indulgent treat!
- Nutty Flavor: Incorporate finely chopped nuts like pecans or walnuts into the crust for added texture and flavor. You can also sprinkle some on top for a crunchy finish.
- Gluten-Free Option: Substitute the digestive biscuits with gluten-free graham crackers or almond flour for a gluten-free crust. Just make sure to check the labels!
- Vegan Cheesecake: Use cashew cream or silken tofu blended with coconut cream as a substitute for cream cheese. Sweeten with maple syrup and use a vegan crust made from oats and coconut oil.
Serving Suggestions
- Fresh Berries: Serve with a side of mixed berries for a pop of color and freshness.
- Whipped Cream: A dollop of homemade whipped cream adds a light touch.
- Chocolate Sauce: Drizzle chocolate sauce on top for an indulgent finish.
- Coffee or Tea: Pair with a warm cup of coffee or herbal tea for a cozy dessert experience.
- Presentation: Garnish with mint leaves for a beautiful touch!
FAQs about Rich Cheesecake
As you embark on your journey to create this delightful Rich Cheesecake, you might have a few questions swirling in your mind. Don’t worry; I’ve got you covered! Here are some common queries I’ve encountered, along with their answers to help you navigate this delicious adventure.
1. Can I make Rich Cheesecake ahead of time?
Absolutely! In fact, making your Rich Cheesecake a day in advance is often recommended. This allows the flavors to meld beautifully and gives it that perfect texture. Just be sure to cover it well in the fridge to keep it fresh!
2. How do I prevent cracks in my cheesecake?
Cracks can be a cheesecake’s worst enemy! To avoid them, make sure to cool your cheesecake slowly in the oven after baking. Also, avoid overmixing the batter, as incorporating too much air can lead to cracks. A water bath can also help maintain moisture during baking.
3. Can I freeze Rich Cheesecake?
Yes, you can freeze your Rich Cheesecake! Just wrap it tightly in plastic wrap and then in aluminum foil to prevent freezer burn. It can last up to three months in the freezer. When you’re ready to enjoy it, let it thaw in the fridge overnight before serving.
4. What can I use instead of cream cheese?
If you’re looking for alternatives, you can use mascarpone cheese for a similar creamy texture. For a vegan option, try blending silken tofu with coconut cream and a bit of sweetener. Just keep in mind that the flavor and texture will vary slightly from the traditional Rich Cheesecake.
5. How do I know when my cheesecake is done baking?
The key to knowing when your Rich Cheesecake is ready is to look for the edges to be firm while the center still has a slight wobble. It will continue to set as it cools. If the center is completely firm, it may be overbaked, leading to a denser texture.
Final Thoughts
Making this Rich Cheesecake is more than just baking; it’s about creating sweet memories in the kitchen. The joy of slicing into that creamy, velvety goodness is unmatched, especially when you see the smiles on your loved ones’ faces. Whether it’s a special occasion or just a Tuesday night, this cheesecake brings a touch of celebration to any moment. So, roll up your sleeves, gather your ingredients, and let the magic happen. Trust me, once you’ve tasted this delightful dessert, you’ll find yourself making it again and again. Happy baking!
Print
Rich Cheesecake: Discover the Ultimate Classic Recipe!
A classic rich cheesecake recipe that is velvety and delicious, perfect for any occasion.
- Total Time: 4 hours 20 minutes
- Yield: 12 servings 1x
Ingredients
- 2 cups crushed digestive biscuits
- 1/2 cup white sugar
- 1/2 cup melted unsalted butter
- 4 (8-ounce) packages softened cream cheese
- 1 cup white sugar
- 1 teaspoon pure vanilla extract
- 4 large eggs
- 1 cup heavy cream
- 1 tablespoon all-purpose flour
Instructions
- Preheat your oven to 325°F (163°C) and grease a 9-inch springform pan with butter or non-stick spray.
- In a mixing bowl, combine the crushed digestive biscuits, 1/2 cup of sugar, and melted butter, stirring until the mixture resembles wet sand.
- Firmly press this mixture into the bottom of the springform pan to create a solid crust.
- In a separate large bowl, use an electric mixer to beat the softened cream cheese until smooth and creamy, about 2-3 minutes.
- Gradually mix in 1 cup of sugar and the vanilla extract until well blended.
- Incorporate the eggs one at a time, mixing on low speed just until each egg is combined—avoid overmixing.
- Carefully fold in the heavy cream and flour until the batter is uniform.
- Pour the cheesecake mixture over the prepared crust.
- Bake for approximately 55-60 minutes, or until the edges are firm and the center has a slight wobble.
- Once baked, turn off the oven and let the cheesecake sit inside for an hour to cool slowly.
- Afterward, take it out and allow it to reach room temperature before refrigerating for at least 4 hours or overnight for the best texture.
Notes
- For a delightful variation, consider garnishing with seasonal fruits or a drizzle of chocolate sauce just before serving.
- Prep Time: 20 minutes
- Cook Time: 60 minutes
- Category: Dessert
- Method: Baking
- Cuisine: American
- Diet: Vegetarian
Nutrition
- Serving Size: 1 slice
- Calories: 400
- Sugar: 25g
- Sodium: 300mg
- Fat: 30g
- Saturated Fat: 18g
- Unsaturated Fat: 8g
- Trans Fat: 0g
- Carbohydrates: 25g
- Fiber: 1g
- Protein: 7g
- Cholesterol: 120mg