
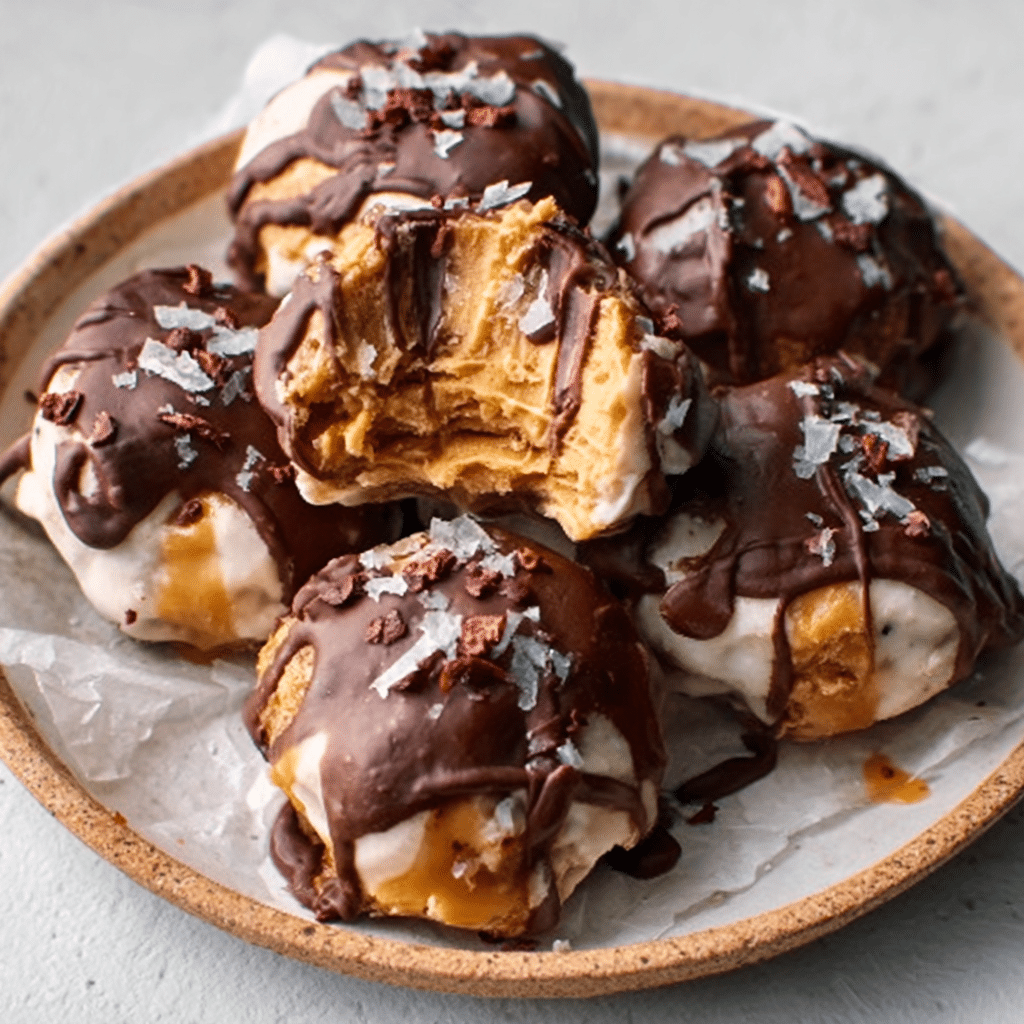
Introduction to Protein Packed Frozen PB Yogurt Bites for Snacking
Hey there, fellow busy bees! If you’re anything like me, juggling work, family, and a million other things, finding time to whip up healthy snacks can feel like a daunting task. That’s where these Protein Packed Frozen PB Yogurt Bites for Snacking come to the rescue! They’re not just delicious; they’re a quick solution for those hectic days when you need a nutritious pick-me-up. Imagine popping one of these creamy, dreamy bites into your mouth and feeling instantly satisfied. Trust me, your taste buds and your busy schedule will thank you!
Why You’ll Love This Protein Packed Frozen PB Yogurt Bites for Snacking
Let’s be real—life can get hectic, and we all need a little help in the snack department! These Protein Packed Frozen PB Yogurt Bites for Snacking are not only super easy to make, but they also pack a flavorful punch. In just a few minutes, you can create a batch that’s perfect for those mid-afternoon cravings or a late-night treat. Plus, they’re a hit with the whole family, making snack time a breeze!
Ingredients for Protein Packed Frozen PB Yogurt Bites for Snacking
Let’s dive into the deliciousness! Here’s what you’ll need to whip up these Protein Packed Frozen PB Yogurt Bites for Snacking. Each ingredient plays a vital role in creating that creamy, dreamy texture and flavor that we all crave.
- Plain Greek Yogurt: This is the star of the show! It’s thick, creamy, and packed with protein, making it a fantastic base for our bites. Plus, it adds a nice tang that balances the sweetness.
- Smooth Peanut Butter: Ah, the classic! It brings that rich, nutty flavor and creaminess that makes these bites irresistible. If you’re feeling adventurous, you can swap it for almond butter for a different twist!
- Maple Syrup: This natural sweetener adds just the right amount of sweetness without being overpowering. It also gives a lovely depth of flavor. If you’re looking for a sugar-free option, honey or agave syrup can work too!
- Pure Vanilla Extract: A splash of this magical liquid elevates the flavor profile, making everything taste just a bit more special. Trust me, it’s worth it!
- Mini Chocolate Chips (optional): Who doesn’t love a little chocolate? These tiny morsels add a delightful sweetness and a fun texture. Feel free to skip them if you’re watching your sugar intake.
- Crushed Almonds (optional): For a little crunch and extra nutrition, crushed almonds are a fantastic addition. They provide healthy fats and a nice contrast to the creamy yogurt. If you’re nut-free, you can leave these out or substitute with seeds!
All the exact measurements for these ingredients are at the bottom of the article, ready for you to print out and take to the kitchen. Happy snacking!
How to Make Protein Packed Frozen PB Yogurt Bites for Snacking
Now that we have our ingredients ready, let’s get down to the fun part—making these Protein Packed Frozen PB Yogurt Bites for Snacking! Follow these simple steps, and you’ll have a delicious treat ready to go in no time.
Step 1: Blend the Base
First things first, grab a large mixing bowl. Add in your plain Greek yogurt, smooth peanut butter, maple syrup, and pure vanilla extract. Now, it’s time to channel your inner chef! Use a whisk or an electric mixer to blend everything together until it’s creamy and smooth. You want it to be as velvety as a cloud! This step is crucial because it sets the stage for the delightful texture of your bites. If you find it a bit thick, don’t hesitate to add a splash of milk to loosen it up.
Step 2: Mix in Extras
Once your base is beautifully blended, it’s time to add some fun! Gently fold in the mini chocolate chips and crushed almonds, if you’re using them. Use a spatula to mix them in, being careful not to over-mix. You want those little chocolate gems and crunchy bits to be evenly distributed throughout the yogurt mixture. This is where the magic happens—each bite will be a delightful surprise!
Step 3: Prepare the Baking Sheet
Now, let’s get organized! Line a baking sheet with parchment paper. This will prevent the bites from sticking and make cleanup a breeze. Using a tablespoon or a small cookie scoop, scoop out dollops of the yogurt mixture and place them on the prepared sheet. Leave about an inch of space between each dollop, as they will spread slightly while freezing. You should have a lovely little army of yogurt bites ready to go!
Step 4: Freeze the Bites
Time to chill out! Carefully transfer the baking sheet to the freezer. Let those bites freeze for at least 2 hours, or until they are completely firm. This is the hardest part—waiting! But trust me, it’s worth it. You’ll be rewarded with creamy, frozen goodness that’s perfect for snacking.
Step 5: Store for Later
Once your bites are frozen solid, it’s time to store them. Gently lift them off the parchment paper and place them in a resealable freezer bag or an airtight container. Make sure to label the bag with the date so you know when you made them. These little gems can be kept in the freezer for up to 2 months, but I doubt they’ll last that long once your family gets a taste!
Step 6: Enjoy Your Snack
When you’re ready to indulge, simply take out a few bites and let them sit at room temperature for about 5 minutes. This will allow them to soften slightly, making them even more enjoyable. Then, pop one in your mouth and savor the creamy, nutty flavor. It’s like a mini dessert that’s good for you—what’s not to love?
Tips for Success
- Make sure your Greek yogurt is at room temperature for easier blending.
- For a fun twist, try adding a pinch of cinnamon or cocoa powder to the mixture.
- Use a cookie scoop for perfectly shaped bites every time.
- Don’t skip the parchment paper—it makes removal a breeze!
- Experiment with different nut butters for unique flavors.
Equipment Needed
- Mixing Bowl: A large bowl for blending your ingredients. A sturdy glass or ceramic bowl works great!
- Whisk or Electric Mixer: For achieving that creamy texture. A simple fork can do the job too!
- Baking Sheet: A standard baking sheet lined with parchment paper is essential.
- Spoon or Cookie Scoop: For portioning out the yogurt mixture into dollops.
- Freezer Bags or Airtight Container: To store your delicious bites. Any resealable bag will do!
Variations
- Nut Butter Swap: Try using almond butter, cashew butter, or sunflower seed butter for a different flavor profile.
- Fruit Add-Ins: Fold in some chopped strawberries, blueberries, or banana slices for a fruity twist.
- Yogurt Flavor: Use flavored Greek yogurt, like vanilla or honey, to enhance the taste without adding extra sweeteners.
- Protein Boost: Mix in a scoop of your favorite protein powder for an extra protein punch, perfect for post-workout snacking.
- Vegan Option: Substitute Greek yogurt with coconut yogurt and maple syrup with agave nectar for a delicious vegan treat.
Serving Suggestions
- Pair your Protein Packed Frozen PB Yogurt Bites for Snacking with fresh fruit like apple slices or berries for a refreshing contrast.
- Enjoy them alongside a warm cup of herbal tea or a glass of almond milk for a cozy snack time.
- For a fun presentation, serve them in a colorful bowl topped with a sprinkle of crushed nuts or coconut flakes.
FAQs about Protein Packed Frozen PB Yogurt Bites for Snacking
Got questions? I’ve got answers! Here are some common queries about these Protein Packed Frozen PB Yogurt Bites for Snacking that might help you out.
1. How long do these yogurt bites last in the freezer?
These tasty bites can be stored in the freezer for up to 2 months. Just make sure they’re in an airtight container or a resealable freezer bag to keep them fresh. But let’s be honest, they probably won’t last that long once your family gets a taste!
2. Can I use flavored yogurt instead of plain Greek yogurt?
Absolutely! Using flavored Greek yogurt can add an extra layer of sweetness and flavor to your bites. Just keep in mind that it may alter the overall sweetness, so you might want to adjust the maple syrup accordingly.
3. What if I have a nut allergy?
No worries! You can easily swap out the peanut butter for sunflower seed butter or soy nut butter. These alternatives will still give you that creamy texture and delicious taste without the nuts. Just make sure to check for any other allergens in your ingredients!
4. Can I make these bites without a mixer?
Definitely! If you don’t have a mixer, a good old-fashioned whisk or even a fork will do the trick. It might take a bit more elbow grease, but you’ll still achieve that creamy consistency. Just be patient and mix until it’s smooth!
5. How can I make these bites more nutritious?
To amp up the nutrition, consider adding a scoop of your favorite protein powder or some chia seeds to the mixture. You can also fold in some finely chopped spinach or kale for a hidden veggie boost. It’s a sneaky way to get more nutrients without sacrificing flavor!
Final Thoughts
Making these Protein Packed Frozen PB Yogurt Bites for Snacking has been a delightful journey, and I hope you feel the same way! They’re not just a quick snack; they’re a little moment of joy in your busy day. Whether you’re sneaking one during a hectic afternoon or sharing them with loved ones, these bites bring smiles and satisfaction. Plus, knowing you’ve whipped up something nutritious and delicious makes it all the more rewarding. So, grab your ingredients, get blending, and enjoy every creamy, nutty bite. You deserve it!
Print
Protein Packed Frozen PB Yogurt Bites for Snacking Made Easy
Delicious and nutritious frozen peanut butter yogurt bites that are perfect for snacking.
- Total Time: 2 hours 10 minutes
- Yield: 12 servings 1x
Ingredients
- 1 cup plain Greek yogurt
- 1/2 cup smooth peanut butter
- 1/4 cup maple syrup
- 1 teaspoon pure vanilla extract
- 1/4 cup mini chocolate chips (optional)
- 1/4 cup crushed almonds (optional)
Instructions
- In a large bowl, blend the Greek yogurt, smooth peanut butter, maple syrup, and vanilla extract until you achieve a creamy consistency.
- Gently mix in the mini chocolate chips and crushed almonds if you’re using them, ensuring they are evenly distributed throughout the yogurt mixture.
- Prepare a baking sheet by lining it with parchment paper. Scoop out small dollops of the yogurt mixture and place them on the sheet, leaving about an inch of space between each dollop.
- Transfer the baking sheet to the freezer and allow the bites to freeze for a minimum of 2 hours, or until they are completely firm.
- After freezing, carefully lift the bites off the parchment paper and store them in a resealable freezer bag or an airtight container. They can be kept in the freezer for up to 2 months.
- To enjoy, take out a few bites and let them sit at room temperature for a few minutes to soften slightly before indulging for the best experience.
Notes
- Swap peanut butter for almond butter for a unique twist.
- Enhance the flavor by adding a dash of cinnamon or a hint of cocoa powder to the mixture.
- Prep Time: 10 minutes
- Cook Time: 0 minutes
- Category: Snack
- Method: Freezing
- Cuisine: American
- Diet: Vegetarian
Nutrition
- Serving Size: 2 bites
- Calories: 120
- Sugar: 4g
- Sodium: 50mg
- Fat: 8g
- Saturated Fat: 1.5g
- Unsaturated Fat: 6.5g
- Trans Fat: 0g
- Carbohydrates: 6g
- Fiber: 1g
- Protein: 5g
- Cholesterol: 5mg