
Introduction to Pizza de Pão
Hey there, fellow food lovers! If you’re anything like me, you know that life can get pretty hectic, especially when juggling family, work, and everything in between. That’s why I’m excited to share my go-to recipe for Pizza de Pão. This cheesy delight is not just a meal; it’s a warm hug on a plate! Perfect for those busy weeknights or when you want to impress your loved ones without spending hours in the kitchen. Trust me, this dish will have everyone asking for seconds, and it’s so easy to whip up!
Why You’ll Love This Pizza de Pão
Let’s be real—who doesn’t love a quick and delicious meal? This Pizza de Pão is a lifesaver for busy days when you need something tasty without the fuss. It’s ready in just 40 minutes, making it perfect for those evenings when you’re racing against the clock. Plus, the cheesy goodness and savory toppings will have your family raving about dinner long after the last bite. It’s comfort food at its finest!
Ingredients for Pizza de Pão
Now, let’s dive into the deliciousness that makes up our Pizza de Pão. Here’s what you’ll need to create this cheesy masterpiece:
- All-purpose flour: The backbone of our dough, giving it that perfect chewy texture. You can also use whole wheat flour for a healthier twist!
- Baking powder: This little magic powder helps our dough rise, making it light and fluffy. No yeast needed here!
- Salt: A pinch of salt enhances all the flavors, making every bite taste just right.
- Sugar: Just a touch of sugar balances the savory elements and adds a hint of sweetness to the dough.
- Milk: This adds moisture and richness to our dough. You can swap it with almond milk or any non-dairy alternative if you prefer.
- Vegetable oil: This keeps the dough tender and adds a bit of richness. Olive oil works great too, giving it a lovely flavor.
- Shredded mozzarella cheese: The star of the show! This gooey cheese melts beautifully and gives that classic pizza taste.
- Pizza sauce: A flavorful base that ties everything together. You can use store-bought or whip up a quick homemade version if you’re feeling adventurous!
- Sliced pepperoni: For those who love a bit of spice and flavor, pepperoni adds a delightful kick. Feel free to swap it out for your favorite toppings!
- Grated Parmesan cheese: This adds a nutty, salty flavor that complements the mozzarella perfectly.
- Dried oregano: A classic Italian herb that brings a warm, aromatic flavor to our pizza.
- Garlic powder: Because who doesn’t love a hint of garlic? It adds depth and enhances the overall taste.
For those of you who like to get creative in the kitchen, I encourage you to experiment with different toppings and sauces. You can find the exact measurements for each ingredient at the bottom of the article, ready for you to print out and take to the grocery store. Happy cooking!
How to Make Pizza de Pão
Now that we have our ingredients ready, let’s get cooking! Making Pizza de Pão is a breeze, and I promise you’ll feel like a kitchen superstar by the end of it. Follow these simple steps, and you’ll have a cheesy, delicious treat that’s sure to impress!
Step 1: Preheat the Oven
First things first, let’s get that oven fired up! Preheat your oven to 400°F (200°C). While it’s warming up, grab a 9×13-inch baking dish and give it a good greasing. This will help our pizza de pão come out easily and prevent any sticking. Trust me, no one wants a pizza disaster!
Step 2: Prepare the Dough
In a large mixing bowl, combine the all-purpose flour, baking powder, salt, and sugar. Mix them together until they’re well combined. This is where the magic begins! The dry ingredients are the foundation of our dough, so make sure they’re mixed thoroughly. It’s like building a house; you need a solid base!
Step 3: Combine Wet Ingredients
Now, it’s time to add the wet ingredients. Pour in the milk and vegetable oil, and stir everything together until a soft dough forms. Don’t worry if it seems a bit sticky; that’s perfectly normal! Just embrace it. If you find it too sticky, a sprinkle of flour can help you out.
Step 4: Spread the Dough
Next, take that lovely dough and spread it evenly in your greased baking dish. Use your hands to press it down gently, making sure it covers the bottom completely. This is where the fun begins! You’re creating the base for your Pizza de Pão, so make it nice and even.
Step 5: Bake the Base
Pop the baking dish into your preheated oven and let it bake for about 15 minutes. You’re looking for a light golden color on the dough. This step is crucial because it gives our pizza a sturdy base to hold all those delicious toppings. While it’s baking, take a moment to enjoy the delightful aroma filling your kitchen!
Step 6: Add the Sauce
Once the dough is lightly golden, carefully remove the dish from the oven. Now, it’s time to spread the pizza sauce evenly over the baked dough. Use a spatula or the back of a spoon to make sure it’s well-distributed. This sauce is the heart of your Pizza de Pão, so don’t be shy with it!
Step 7: Layer the Cheese and Toppings
Now comes the best part—layering on the cheese and toppings! Start by sprinkling the shredded mozzarella cheese generously over the sauce. Then, add the sliced pepperoni, followed by a sprinkle of grated Parmesan cheese. Feel free to get creative here! If you’re a veggie lover, swap out the pepperoni for your favorite vegetables.
Step 8: Season the Pizza
To elevate the flavors, sprinkle the dried oregano and garlic powder on top. These spices add a wonderful aroma and taste that will make your pizza irresistible. It’s like giving your Pizza de Pão a little extra love!
Step 9: Final Bake
Return the dish to the oven and bake for an additional 10-15 minutes. Keep an eye on it! You want the cheese to be melted and bubbly, with a lovely golden color on top. This is the moment when your kitchen transforms into a pizzeria!
Step 10: Serve
Once it’s done baking, allow your Pizza de Pão to cool for a few minutes. This will make slicing easier and prevent any cheese burns! Then, cut it into squares and serve it up. Your family will be lining up for a taste of this cheesy delight!

Tips for Success
- Measure your ingredients accurately for the best results—baking is a science!
- Don’t skip pre-baking the dough; it ensures a sturdy base for your toppings.
- Feel free to customize toppings based on your family’s preferences—everyone loves a personal touch!
- Let the pizza cool slightly before slicing to keep the cheese intact.
- Store leftovers in an airtight container for a quick snack the next day!
Equipment Needed
- 9×13-inch baking dish: A must-have for this recipe. If you don’t have one, a similar-sized oven-safe dish will work.
- Mixing bowls: Use any size you have on hand; just make sure they’re big enough to hold your ingredients.
- Spatula: Perfect for spreading sauce and toppings. A spoon can work in a pinch!
- Measuring cups and spoons: Essential for accuracy. If you’re in a hurry, eyeballing can work too, but results may vary!
Variations
- Vegetarian Delight: Swap out the pepperoni for a colorful mix of bell peppers, mushrooms, and olives. It’s a garden party on a plate!
- Spicy Kick: Add sliced jalapeños or crushed red pepper flakes for a fiery twist that’ll wake up your taste buds!
- Cheesy Extravaganza: Mix in different cheeses like cheddar or gouda for a richer flavor profile. The more, the merrier!
- Herb Infusion: Experiment with fresh herbs like basil or thyme instead of dried oregano for a burst of freshness.
- Gluten-Free Option: Use a gluten-free flour blend to make this dish suitable for those with gluten sensitivities. Just ensure your baking powder is also gluten-free!
Serving Suggestions
- Fresh Salad: Pair your Pizza de Pão with a crisp garden salad for a refreshing contrast.
- Garlic Bread: Serve with warm garlic breadsticks for an extra cheesy experience.
- Wine Pairing: A light red wine, like Pinot Noir, complements the flavors beautifully.
- Presentation: Cut into fun shapes for kids or serve on a colorful platter to impress guests!
FAQs about Pizza de Pão
1. Can I make Pizza de Pão ahead of time?
Absolutely! You can prepare the dough and toppings in advance. Just assemble everything and store it in the fridge. When you’re ready to eat, pop it in the oven for a quick bake. It’s a great way to save time on busy nights!
2. What can I substitute for pepperoni in Pizza de Pão?
If pepperoni isn’t your thing, no worries! You can use any toppings you love. Try veggies like bell peppers, mushrooms, or even cooked chicken. The beauty of Pizza de Pão is its versatility!
3. How do I store leftovers?
Store any leftover Pizza de Pão in an airtight container in the fridge. It’ll stay fresh for about 3-4 days. Just reheat in the oven or microwave when you’re ready for a tasty snack!
4. Can I freeze Pizza de Pão?
Yes, you can freeze it! Just make sure it’s completely cooled before wrapping it tightly in plastic wrap and then aluminum foil. It can last up to 2 months in the freezer. When you’re ready to enjoy, thaw it in the fridge and reheat in the oven.
5. Is Pizza de Pão suitable for kids?
Definitely! Kids love the cheesy goodness and fun toppings. You can even let them help with the assembly, making it a fun family activity. Plus, it’s a great way to sneak in some veggies if you choose to add them!
Final Thoughts
Making Pizza de Pão is more than just cooking; it’s about creating moments of joy and togetherness. This cheesy delight brings smiles to the dinner table, turning an ordinary evening into a special occasion. Whether you’re enjoying it with family or sharing it with friends, each bite is a reminder of the love and warmth that home-cooked meals bring. Plus, the ease of preparation means you can spend less time in the kitchen and more time making memories. So, roll up your sleeves, gather your loved ones, and dive into this delicious adventure together!
Print
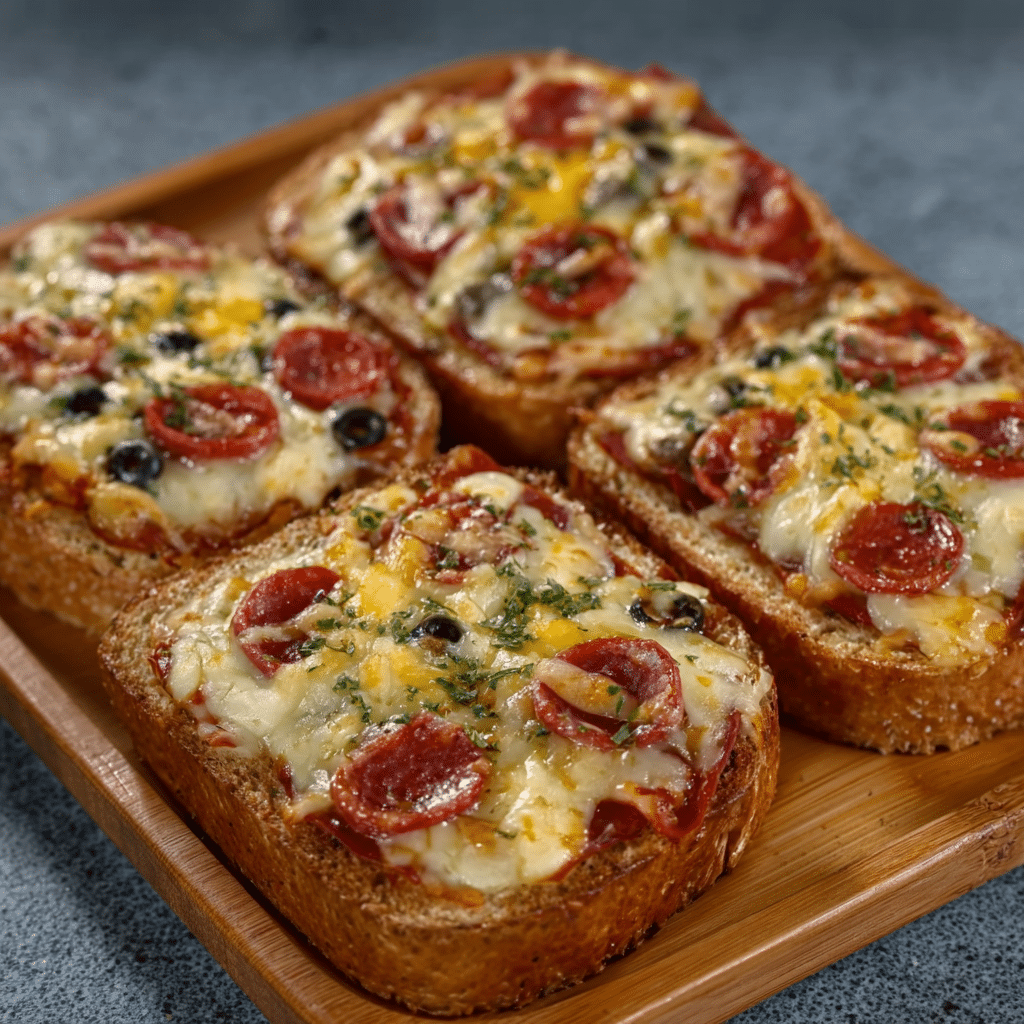
Pizza de Pão: Discover the Ultimate Cheesy Delight!
Pizza de Pão is a delicious cheesy bread pizza that combines the flavors of mozzarella, pepperoni, and a variety of spices for a delightful treat.
- Total Time: 40 minutes
- Yield: 6 servings 1x
Ingredients
- 2 cups all-purpose flour
- 1 tablespoon baking powder
- 1 teaspoon salt
- 1 tablespoon sugar
- 1 cup milk
- 1/4 cup vegetable oil
- 1 cup shredded mozzarella cheese
- 1/2 cup pizza sauce
- 1/2 cup sliced pepperoni
- 1/4 cup grated Parmesan cheese
- 1 teaspoon dried oregano
- 1 teaspoon garlic powder
Instructions
- Preheat your oven to 400°F (200°C) and grease a 9×13-inch baking dish.
- In a large bowl, mix together the flour, baking powder, salt, and sugar until well combined.
- Add the milk and vegetable oil to the dry ingredients, stirring until a soft dough forms.
- Spread the dough evenly in the prepared baking dish, pressing it down to cover the bottom.
- Bake the dough in the preheated oven for 15 minutes, or until lightly golden.
- Remove the dish from the oven and spread the pizza sauce evenly over the baked dough.
- Sprinkle the shredded mozzarella cheese over the sauce, followed by the sliced pepperoni and grated Parmesan cheese.
- Sprinkle the dried oregano and garlic powder on top for added flavor.
- Return the dish to the oven and bake for an additional 10-15 minutes, or until the cheese is melted and bubbly.
- Allow to cool for a few minutes before slicing into squares and serving.
Notes
- For a spicy kick, add sliced jalapeños or crushed red pepper flakes on top before baking.
- For a vegetarian option, substitute the pepperoni with your favorite vegetables, such as bell peppers, mushrooms, or olives.
- Prep Time: 15 minutes
- Cook Time: 25 minutes
- Category: Appetizer
- Method: Baking
- Cuisine: Italian
- Diet: Vegetarian
Nutrition
- Serving Size: 1 square
- Calories: 280
- Sugar: 1g
- Sodium: 500mg
- Fat: 12g
- Saturated Fat: 4g
- Unsaturated Fat: 8g
- Trans Fat: 0g
- Carbohydrates: 30g
- Fiber: 1g
- Protein: 10g
- Cholesterol: 20mg