
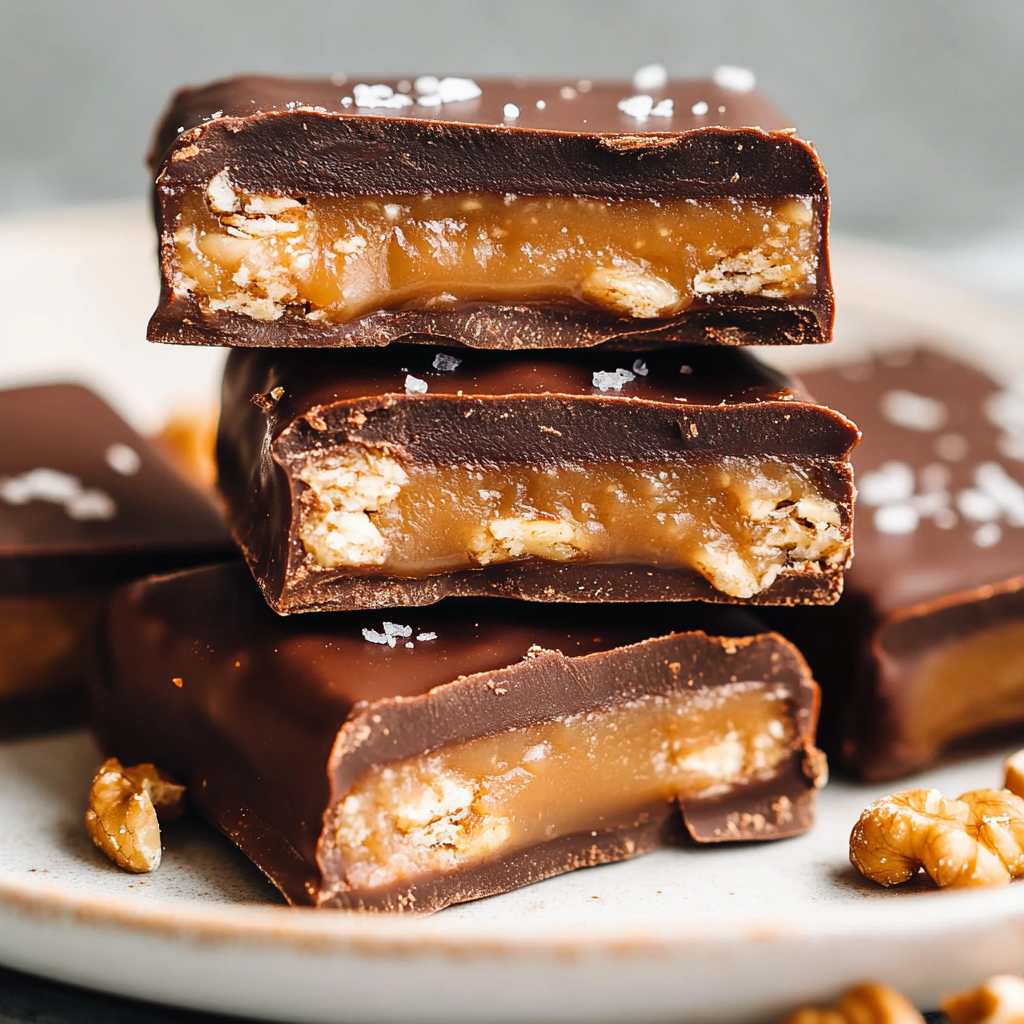
Introduction to Healthy Twix Bars
Hey there, fellow food lovers! If you’re anything like me, you sometimes crave a sweet treat but want to keep things on the healthier side. That’s where these healthy Twix bars come into play! They’re the perfect solution for those busy days when you need a quick pick-me-up or a delightful dessert to impress your loved ones. With just a handful of wholesome ingredients, you can whip up these delicious bars in no time. Trust me, your taste buds will thank you, and you won’t feel guilty indulging in this delightful treat!
Why You’ll Love This Healthy Twix Bars
Let’s be honest—life can get hectic, and finding time to whip up a dessert can feel like a daunting task. That’s why you’ll adore these healthy Twix bars! They’re not only quick to make, but they also satisfy that sweet tooth without the guilt. Plus, they’re packed with nutritious ingredients, making them a treat you can feel good about sharing with family and friends. Who knew healthy could taste this good?
Ingredients for Healthy Twix Bars
Now, let’s dive into the ingredients that make these healthy Twix bars not just delicious but also nutritious! Each component plays a vital role in creating that perfect balance of flavor and texture. Here’s what you’ll need:
- Almond flour: This gluten-free flour adds a nutty flavor and is rich in healthy fats and protein. It’s a fantastic base for our bars!
- Coconut flour: A little goes a long way! This flour is high in fiber and helps absorb moisture, giving our bars a lovely texture.
- Cocoa powder: Unsweetened cocoa powder brings that rich chocolatey taste we all love, without the added sugar. It’s also packed with antioxidants!
- Maple syrup: A natural sweetener that adds a hint of caramel flavor. It’s a great alternative to refined sugars and gives our bars a touch of sweetness.
- Coconut oil: This healthy fat not only helps bind the ingredients together but also adds a subtle coconut flavor. Plus, it’s great for your skin!
- Vanilla extract: A splash of vanilla enhances the overall flavor, making these bars taste even more indulgent.
- Salt: Just a pinch! It helps balance the sweetness and brings out the flavors of the other ingredients.
- Natural peanut butter: Creamy and rich, this adds a delicious layer of flavor and healthy fats. You can also use almond butter if you prefer!
- Dark chocolate chips: Look for chips with 70% cocoa or higher for a rich, decadent topping that’s still on the healthier side.
- Coconut oil (for melting chocolate): A little extra coconut oil helps the chocolate melt smoothly, making it easy to pour over the peanut butter layer.
For those of you who might have dietary restrictions or preferences, here are a couple of tips:
- If you’re looking for a crunchier texture, feel free to add some chopped nuts, like almonds or pecans, to the base layer.
- To make these bars vegan, simply swap the maple syrup for agave syrup and ensure your chocolate chips are dairy-free.
Remember, the exact quantities for each ingredient are listed at the bottom of the article, so you can easily print them out for your next baking adventure!
How to Make Healthy Twix Bars
Now that we’ve gathered all our ingredients, it’s time to roll up our sleeves and get to the fun part—making these healthy Twix bars! Follow these simple steps, and you’ll have a delicious treat ready in no time.
Step 1: Prepare the Base Layer
First things first, let’s mix our dry ingredients! In a medium bowl, combine the almond flour, coconut flour, cocoa powder, and salt. Give it a good stir until everything is well blended. This is where the magic begins! The combination of these flours creates a nutty, chocolatey base that’s simply irresistible. Once mixed, add in the maple syrup, melted coconut oil, and vanilla extract. Stir until a dough forms. It should be slightly sticky but hold together nicely. If it feels too dry, don’t hesitate to add a splash of water!
Step 2: Press the Dough
Now, let’s get that dough into our baking dish! Grab an 8×8-inch baking dish and line it with parchment paper for easy removal later. Take your dough and press it evenly into the bottom of the dish. Use your fingers or the back of a measuring cup to smooth it out. You want it to be about 1/4 inch thick. This base layer is the foundation of your healthy Twix bars, so make sure it’s nice and even!
Step 3: Add the Peanut Butter Layer
Next up, it’s time for the star of the show—peanut butter! In a small microwave-safe bowl, pop your natural peanut butter in the microwave for about 20 seconds. This will make it easier to spread. Once it’s slightly melted, take it out and give it a good stir. Now, spread the peanut butter evenly over the base layer. Don’t be shy; this layer adds a creamy richness that pairs perfectly with the chocolate!
Step 4: Freeze to Set
Now, we need to let our creation set. Place the dish in the freezer for about 30 minutes. This step is crucial! Freezing helps the layers firm up, making it easier to cut later. Plus, it gives the flavors a chance to meld together. While you wait, you can daydream about how delicious these healthy Twix bars will be!
Step 5: Melt the Chocolate
While the bars are chilling, let’s melt our chocolate! In a microwave-safe bowl, combine the dark chocolate chips and 1 tablespoon of coconut oil. Microwave in 30-second intervals, stirring in between, until the chocolate is fully melted and smooth. This chocolate layer is what makes these bars feel indulgent, so take your time to get it just right!
Step 6: Pour and Spread the Chocolate
Once your chocolate is melted, it’s time to pour it over the peanut butter layer. Carefully remove the dish from the freezer and pour the melted chocolate on top. Use a spatula to spread it evenly, making sure every inch is covered. This is where the magic happens—chocolate on top of peanut butter is a match made in heaven!
Step 7: Final Freeze
Now, it’s back to the freezer for our final freeze! Place the dish back in the freezer for another 30 minutes. This will allow the chocolate to harden completely, giving you that satisfying snap when you bite into your healthy Twix bars. Trust me, the wait will be worth it!
Step 8: Cut and Serve
Once everything is set, it’s time for the best part—cutting and serving! Remove the dish from the freezer and lift the bars out using the parchment paper. Place them on a cutting board and slice them into bars. You can make them as big or small as you like! Serve them immediately, or store them in an airtight container in the refrigerator for up to a week. These bars are perfect for a quick snack or a sweet treat after dinner. Enjoy every guilt-free bite!

Tips for Success
- Make sure your ingredients are at room temperature for easier mixing.
- Use a spatula to help press the dough evenly into the baking dish.
- Don’t skip the freezing steps; they’re key for the right texture!
- Experiment with different nut butters for a unique flavor twist.
- Store your bars in an airtight container to keep them fresh longer.
Equipment Needed
- Mixing bowls: A medium bowl for mixing ingredients and a small bowl for melting chocolate. Any size will do!
- Baking dish: An 8×8-inch dish is ideal, but a similar-sized dish works too.
- Parchment paper: For easy removal; aluminum foil can be a substitute.
- Spatula: Great for spreading and pressing; a spoon can work in a pinch.
- Microwave-safe bowl: For melting chocolate; a small saucepan can also be used on the stove.
Variations
- Nut-Free Option: Substitute almond flour with sunflower seed flour to make these healthy Twix bars nut-free, perfect for those with nut allergies.
- Protein Boost: Add a scoop of your favorite protein powder to the base layer for an extra nutritional punch. This is great for post-workout snacks!
- Flavorful Swaps: Try using almond butter or cashew butter instead of peanut butter for a different flavor profile. Each nut butter brings its own unique taste!
- Sweetness Level: Adjust the sweetness by adding more or less maple syrup based on your preference. You can also use honey or agave syrup as alternatives.
- Spice It Up: Add a pinch of cinnamon or a dash of sea salt on top of the chocolate layer for an extra flavor kick that complements the sweetness beautifully.
- Fruit Add-Ins: Mix in some dried fruits like cranberries or raisins into the base layer for a chewy texture and a burst of natural sweetness.
Serving Suggestions
- Pair your healthy Twix bars with a cup of herbal tea for a cozy afternoon treat.
- Serve with fresh fruit, like strawberries or banana slices, for a refreshing contrast.
- For a fun presentation, drizzle extra melted chocolate on top before serving.
- Wrap them in colorful parchment paper for a delightful gift idea!
FAQs about Healthy Twix Bars
Got questions about these healthy Twix bars? You’re not alone! Here are some common queries I’ve come across, along with my answers to help you out:
1. Can I make these healthy Twix bars ahead of time?
Absolutely! These bars are perfect for meal prep. You can make them a few days in advance and store them in an airtight container in the refrigerator. They’ll stay fresh for up to a week, making them a great grab-and-go snack!
2. Are these healthy Twix bars suitable for kids?
Yes, indeed! These bars are a healthier alternative to traditional candy bars, and kids will love the sweet, chocolatey flavor. Plus, you can feel good knowing they’re made with wholesome ingredients. Just be sure to keep an eye on portion sizes!
3. Can I substitute the peanut butter with something else?
Definitely! If you or your family have nut allergies, you can use sunflower seed butter or tahini instead. Both options will still give you that creamy texture and delicious flavor without the nuts!
4. How can I make these bars even healthier?
If you want to amp up the nutrition, consider adding a scoop of protein powder to the base layer or mixing in some chia seeds or flaxseeds. These additions will boost the fiber and protein content, making your healthy Twix bars even more satisfying!
5. What’s the best way to store leftover bars?
To keep your bars fresh, store them in an airtight container in the refrigerator. If you want to keep them for longer, you can also freeze them. Just make sure to separate the bars with parchment paper to prevent sticking!
Final Thoughts
Making these healthy Twix bars has been such a joy, and I hope you feel the same way when you whip them up in your kitchen! They’re not just a treat; they’re a reminder that you can indulge without the guilt. Whether you’re enjoying them after a long day or sharing them with family and friends, these bars bring a little sweetness to life. Plus, knowing you’ve created something nutritious makes every bite even more satisfying. So go ahead, treat yourself—you deserve it! Happy baking, and may your kitchen be filled with love and laughter!
Print
Healthy Twix bars: Indulge guilt-free with this easy recipe!
Indulge guilt-free with this easy recipe for healthy Twix bars that are delicious and nutritious.
- Total Time: 1 hour 15 minutes
- Yield: 12 bars 1x
Ingredients
- 1 cup almond flour
- 1/2 cup coconut flour
- 1/4 cup cocoa powder
- 1/4 cup maple syrup
- 1/4 cup coconut oil, melted
- 1/2 teaspoon vanilla extract
- 1/4 teaspoon salt
- 1/2 cup natural peanut butter
- 1/4 cup dark chocolate chips (70% cocoa or higher)
- 1 tablespoon coconut oil (for melting chocolate)
Instructions
- In a medium bowl, mix almond flour, coconut flour, cocoa powder, maple syrup, melted coconut oil, vanilla extract, and salt until a dough forms.
- Press the dough into a lined 8×8-inch baking dish evenly to create the base layer.
- In a small bowl, microwave the peanut butter for about 20 seconds until slightly melted. Spread the peanut butter evenly over the base layer.
- Place the dish in the freezer for 30 minutes to set.
- In a microwave-safe bowl, combine dark chocolate chips and 1 tablespoon of coconut oil. Microwave in 30-second intervals, stirring in between, until fully melted and smooth.
- Remove the dish from the freezer and pour the melted chocolate over the peanut butter layer, spreading it evenly.
- Return the dish to the freezer for another 30 minutes to allow the chocolate to harden.
- Once set, remove from the dish and cut into bars.
- Serve immediately or store in an airtight container in the refrigerator for up to one week.
Notes
- For a crunchier texture, add 1/4 cup of chopped nuts (like almonds or pecans) to the base layer.
- To make it vegan, substitute maple syrup with agave syrup and ensure the chocolate chips are dairy-free.
- Prep Time: 15 minutes
- Cook Time: 1 hour
- Category: Dessert
- Method: No-Bake
- Cuisine: Healthy
- Diet: Vegan
Nutrition
- Serving Size: 1 bar
- Calories: 150
- Sugar: 2g
- Sodium: 50mg
- Fat: 12g
- Saturated Fat: 6g
- Unsaturated Fat: 4g
- Trans Fat: 0g
- Carbohydrates: 6g
- Fiber: 2g
- Protein: 4g
- Cholesterol: 0mg