

Introduction to Garlic Potato Stacks
Hey there, fellow home cooks! If you’re anything like me, you know that sometimes, dinner can feel like a race against the clock. That’s where these delightful Garlic Potato Stacks come in! They’re not just a side dish; they’re a little tower of joy that can elevate any meal with minimal effort. Imagine crispy, golden layers of potatoes infused with garlic goodness, all baked to perfection. Whether you’re looking to impress your family or just want a quick solution for a busy weeknight, these stacks are here to save the day!
Why You’ll Love This Garlic Potato Stacks
Let’s be honest—life can get hectic, and finding time to whip up a delicious side dish can feel like a daunting task. That’s why I adore these Garlic Potato Stacks. They’re quick to prepare, bake beautifully in just one pan, and pack a flavor punch that’ll have your family asking for seconds. Plus, they look so fancy, you’ll feel like a gourmet chef without the fuss. What’s not to love?
Ingredients for Garlic Potato Stacks
Now, let’s dive into the ingredients that make these Garlic Potato Stacks a hit at the dinner table. You’ll find that most of these items are pantry staples, making it easy to whip them up whenever the craving strikes!
- Large russet potatoes: These starchy beauties are perfect for stacking. Their texture holds up well during baking, giving you that crispy exterior and fluffy interior.
- Unsalted butter: This adds richness and helps the garlic and seasonings cling to the potatoes. If you’re watching your sodium, unsalted is the way to go!
- Garlic: Freshly minced garlic is a must for that aromatic flavor. You can also use garlic powder in a pinch, but fresh really takes it to the next level.
- Salt: A little salt enhances all the flavors. Feel free to adjust based on your taste preferences or dietary needs.
- Black pepper: Just a dash adds a subtle kick. If you like it spicy, consider using freshly cracked black pepper for a bolder flavor.
- Dried thyme: This herb brings a lovely earthiness to the dish. If you don’t have thyme, rosemary or Italian seasoning can work as great substitutes.
- Grated Parmesan cheese: This cheesy topping adds a savory crunch. You can swap it for cheddar or even a dairy-free alternative if you prefer.
- Fresh parsley: Chopped parsley is for garnish, adding a pop of color and freshness. It’s optional, but it makes your stacks look extra appealing!
For those of you who love to experiment, consider adding a sprinkle of smoked paprika or cayenne pepper to the butter mixture for an extra flavor boost. And if you’re feeling adventurous, sweet potatoes can be a delightful substitute for a sweeter twist on this dish. Remember, the exact quantities for each ingredient are listed at the bottom of the article, ready for you to print out and take to the kitchen!
How to Make Garlic Potato Stacks
Now that we have our ingredients ready, let’s get cooking! Making these Garlic Potato Stacks is a breeze, and I promise you’ll feel like a culinary superstar in no time. Follow these simple steps, and you’ll have a delicious side dish that’s sure to impress!
Step 1: Preheat the Oven
First things first, preheat your oven to 400°F (200°C). This is crucial for getting those potato stacks nice and crispy. While the oven is warming up, grab your muffin tin and give it a good greasing with cooking spray or butter. This will help the stacks slide out easily later on.
Step 2: Prepare the Potatoes
Next, wash and peel your large russet potatoes. Once they’re clean and ready, slice them into thin rounds, about 1/8 inch thick. A sharp knife or a mandoline slicer works wonders here. The thinner the slices, the better they’ll stack and crisp up in the oven!
Step 3: Mix the Coating
In a large bowl, combine the melted butter, minced garlic, salt, black pepper, and dried thyme. This mixture is where the magic happens! Toss in your potato slices and make sure they’re well coated. You want every slice to soak up that garlicky goodness. It’s like giving your potatoes a warm, buttery hug!
Step 4: Stack the Potatoes
Now comes the fun part—stacking! Begin layering the potato slices in the greased muffin tin. Aim for about 6-8 slices per cup, standing them vertically. It’s okay if they’re a little wobbly; they’ll hold together as they bake. Just think of it as building a delicious potato tower!
Step 5: Add Cheese
Once all the potato slices are stacked, it’s time to sprinkle the grated Parmesan cheese evenly over the tops of each stack. This cheesy layer will create a delightful crust as it bakes, adding that extra flavor we all love. Don’t be shy—more cheese means more happiness!
Step 6: Bake Covered
Cover the muffin tin with aluminum foil and pop it into your preheated oven. Bake for 30 minutes. This step helps the potatoes cook through and become tender. The foil traps the steam, ensuring your stacks don’t dry out.
Step 7: Bake Uncovered
After 30 minutes, carefully remove the foil. Now, let those stacks bake uncovered for an additional 15-20 minutes. Keep an eye on them! You want them to turn golden brown and crispy on top. The aroma wafting through your kitchen will be absolutely irresistible!
Step 8: Cool and Serve
Once they’re perfectly baked, remove the muffin tin from the oven and let it cool for a few minutes. This is important—trust me, you don’t want to burn your fingers! Carefully remove the stacks from the muffin tin using a fork or small spatula. They should pop out easily. Garnish with chopped fresh parsley before serving, and voilà! You’ve just created a stunning side dish that’s as tasty as it is beautiful.

Tips for Success
- Make sure your potato slices are uniform in thickness for even cooking.
- Don’t skip the greasing step; it’s key to getting those stacks out of the tin easily.
- Feel free to experiment with herbs—rosemary or oregano can add a delightful twist!
- For extra crispiness, broil the stacks for a minute or two at the end.
- Serve immediately for the best texture; they’re best enjoyed fresh out of the oven!
Equipment Needed
- Muffin tin: A standard 12-cup muffin tin works best, but you can use a mini muffin tin for smaller stacks.
- Sharp knife or mandoline slicer: For slicing the potatoes evenly.
- Mixing bowl: Any large bowl will do for mixing the ingredients.
- Aluminum foil: Essential for covering the muffin tin while baking.
- Spatula or fork: To help remove the stacks from the tin easily.
Variations
- Sweet Potato Stacks: Swap out russet potatoes for sweet potatoes for a sweeter, more colorful twist. They add a lovely flavor and a hint of natural sweetness!
- Herb-Infused Butter: Experiment with different herbs like rosemary, dill, or basil in the butter mixture for a unique flavor profile that complements your meal.
- Cheese Alternatives: If you’re looking for a dairy-free option, try using nutritional yeast or a dairy-free cheese substitute to keep the cheesy goodness without the dairy.
- Spicy Kick: Add a pinch of cayenne pepper or red pepper flakes to the butter mixture for a spicy version that’ll wake up your taste buds!
- Vegetable Add-Ins: Toss in thinly sliced onions or bell peppers with the potatoes for added flavor and nutrition. They’ll roast beautifully alongside the stacks!
Serving Suggestions
- Pair with Protein: These Garlic Potato Stacks are perfect alongside grilled chicken, steak, or roasted fish for a complete meal.
- Fresh Salad: Serve with a crisp green salad drizzled with vinaigrette to balance the richness of the potatoes.
- Presentation: Arrange the stacks on a colorful platter and garnish with extra parsley for a pop of color!
- Wine Pairing: A chilled white wine, like Sauvignon Blanc, complements the garlic flavor beautifully.
FAQs about Garlic Potato Stacks
Got questions about these delightful Garlic Potato Stacks? You’re not alone! Here are some common queries I’ve encountered, along with my answers to help you navigate this delicious recipe.
1. Can I make Garlic Potato Stacks ahead of time?
Absolutely! You can prepare the potato stacks and assemble them in the muffin tin a few hours in advance. Just cover them with plastic wrap and store them in the fridge. When you’re ready to bake, simply pop them in the oven. They might need a few extra minutes to cook through, but they’ll still turn out delicious!
2. What can I serve with Garlic Potato Stacks?
These Garlic Potato Stacks pair wonderfully with a variety of main dishes. Think grilled chicken, roasted pork, or even a hearty vegetable stew. They also make a fantastic side for a fresh salad or a light soup. The options are endless!
3. Can I use different types of potatoes?
Yes, you can! While russet potatoes are my go-to for their texture, you can experiment with Yukon Gold or even sweet potatoes for a different flavor. Just keep in mind that cooking times may vary slightly depending on the type of potato you choose.
4. How do I store leftovers?
If you have any leftovers (which is rare in my house!), store them in an airtight container in the fridge for up to three days. Reheat them in the oven for a few minutes to regain that crispy texture. Microwaving is an option, but they won’t be as crispy!
5. Can I make these stacks gluten-free?
Yes, you can! The ingredients in Garlic Potato Stacks are naturally gluten-free. Just ensure that any cheese or additional toppings you use are also gluten-free. Enjoy without worry!
Final Thoughts
Creating these Garlic Potato Stacks is more than just cooking; it’s about bringing joy to your table and delighting your loved ones. The crispy layers, infused with garlic and topped with cheese, make for a side dish that’s both comforting and impressive. Whether it’s a busy weeknight or a special occasion, these stacks are sure to elevate your meal. Plus, they’re a fantastic way to get everyone excited about potatoes! So, roll up your sleeves, embrace the deliciousness, and enjoy the smiles that come with every bite. Happy cooking!
Print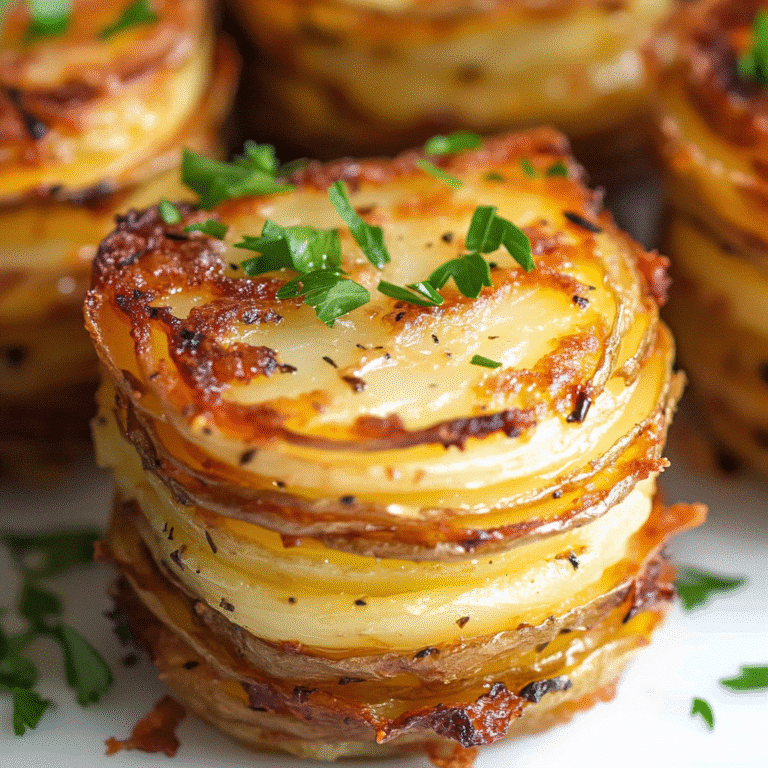
Garlic Potato Stacks: Elevate Your Side Dish Game!
Garlic Potato Stacks are a delicious and visually appealing side dish that elevates any meal with their crispy texture and rich flavor.
- Total Time: 1 hour
- Yield: Serves 4
Ingredients
- 2 large russet potatoes
- 1/4 cup unsalted butter, melted
- 4 cloves garlic, minced
- 1 teaspoon salt
- 1/2 teaspoon black pepper
- 1 teaspoon dried thyme
- 1/2 cup grated Parmesan cheese
- 1/4 cup chopped fresh parsley (for garnish)
Instructions
- Preheat your oven to 400°F (200°C). Grease a 12-cup muffin tin with cooking spray or butter.
- Wash and peel the potatoes, then slice them into thin rounds, about 1/8 inch thick.
- In a large bowl, combine the melted butter, minced garlic, salt, black pepper, and dried thyme. Add the potato slices and toss until they are well coated.
- Begin stacking the potato slices in the greased muffin tin, layering them vertically to create stacks. Aim for about 6-8 slices per cup.
- Once all the potato slices are stacked, sprinkle the grated Parmesan cheese evenly over the tops of each stack.
- Cover the muffin tin with aluminum foil and bake in the preheated oven for 30 minutes.
- After 30 minutes, remove the foil and bake for an additional 15-20 minutes, or until the potatoes are golden brown and crispy on top.
- Remove from the oven and let cool for a few minutes. Carefully remove the stacks from the muffin tin using a fork or small spatula.
- Garnish with chopped fresh parsley before serving.
Notes
- For extra flavor, try adding a sprinkle of smoked paprika or cayenne pepper to the butter mixture before tossing with the potatoes.
- You can also substitute sweet potatoes for a sweeter twist on this dish.
- Prep Time: 15 minutes
- Cook Time: 45 minutes
- Category: Side Dish
- Method: Baking
- Cuisine: American
- Diet: Vegetarian
Nutrition
- Serving Size: 1 stack
- Calories: 250
- Sugar: 1g
- Sodium: 500mg
- Fat: 12g
- Saturated Fat: 7g
- Unsaturated Fat: 3g
- Trans Fat: 0g
- Carbohydrates: 30g
- Fiber: 3g
- Protein: 5g
- Cholesterol: 30mg