
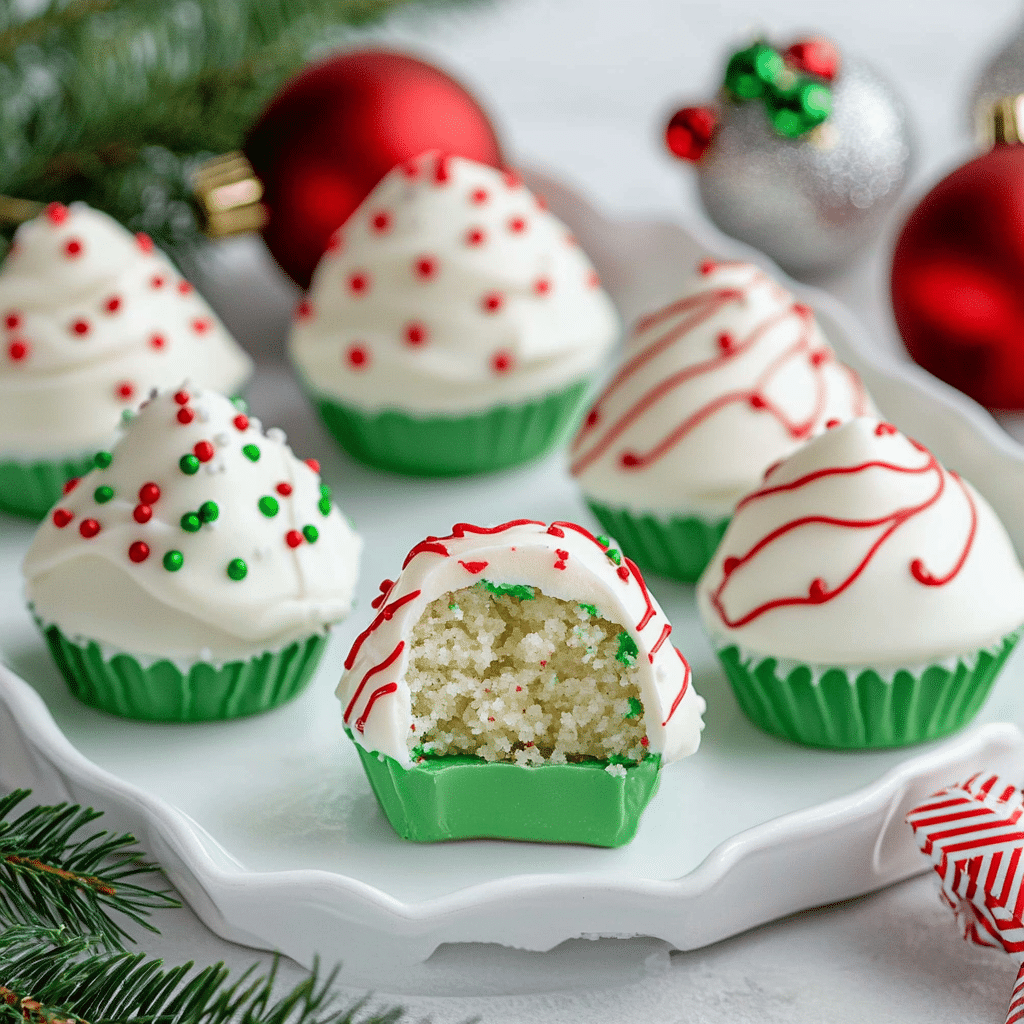
Introduction to Little Debbie Christmas Tree Cake Truffles
Ah, the holiday season! A time filled with joy, laughter, and, let’s be honest, a bit of chaos. If you’re like me, juggling family gatherings, shopping, and the never-ending to-do list, you might find yourself in need of a quick and delightful treat. Enter the Little Debbie Christmas Tree Cake Truffles! These little bites of joy are not only super easy to whip up, but they also bring a festive flair to any gathering. Imagine the smiles on your loved ones’ faces when they take a bite of these creamy, sweet truffles. Trust me, they’ll think you’ve spent hours in the kitchen, when really, it’s just a matter of mixing a few ingredients and letting the magic happen!
Why You’ll Love This Little Debbie Christmas Tree Cake Truffles
Let’s face it, the holiday season can be a whirlwind! That’s why these Little Debbie Christmas Tree Cake Truffles are a lifesaver. They’re incredibly easy to make, taking just about an hour from start to finish. Plus, they’re a crowd-pleaser! With their creamy texture and festive look, they’ll have everyone raving. You’ll love how they bring joy without the stress, making your holiday gatherings a little sweeter!
Ingredients for Little Debbie Christmas Tree Cake Truffles
Gathering the right ingredients is half the fun of making Little Debbie Christmas Tree Cake Truffles. Here’s what you’ll need to create these delightful treats:
- Little Debbie Christmas Tree Cakes: These iconic cakes are the star of the show! Their festive flavor and soft texture make them perfect for truffles.
- Cream Cheese: This adds a rich, creamy base to the truffles. Make sure it’s softened for easy mixing. If you’re feeling adventurous, try using flavored cream cheese for a twist!
- Powdered Sugar: This sweetens the mixture and gives it that delightful truffle texture. It’s a must for that melt-in-your-mouth experience.
- Vanilla Extract: A splash of vanilla enhances the overall flavor, making these truffles taste even more indulgent. You can also use almond extract for a unique twist!
- White Chocolate Chips: These are used for coating the truffles, adding a sweet, creamy layer. If you prefer a different flavor, feel free to swap them for milk chocolate chips.
- Sprinkles: These are for decoration and add a festive touch! Choose colorful sprinkles to make your truffles pop on the holiday dessert table.
For exact measurements, check the bottom of the article where you can find everything listed for easy printing. Happy baking!
How to Make Little Debbie Christmas Tree Cake Truffles
Now that you have all your ingredients ready, let’s dive into the fun part—making those Little Debbie Christmas Tree Cake Truffles! This process is straightforward and perfect for busy days when you want to whip up something special without spending hours in the kitchen. Follow these simple steps, and you’ll have a delightful treat in no time!
Step 1: Crumble the Cakes
First things first, let’s get those Little Debbie Christmas Tree Cakes ready. Open the boxes and remove the cakes from their packaging. Place them in a large mixing bowl. Now, here comes the fun part—using your hands or a fork, crumble the cakes into fine pieces. You want them to resemble a soft, fluffy snow. This step is not only satisfying but also sets the stage for the creamy truffle mixture to come!
Step 2: Mix the Ingredients
Once your cakes are crumbled, it’s time to add the magic! Toss in the softened cream cheese, powdered sugar, and vanilla extract. Using a spatula or your hands, mix everything together until it forms a dough-like consistency. It should be well combined and slightly sticky. If you’re feeling adventurous, this is the perfect moment to add a teaspoon of almond extract for an extra layer of flavor. Trust me, it’s worth it!
Step 3: Chill the Mixture
After mixing, cover the bowl with plastic wrap and pop it in the refrigerator for about 30 minutes. This chilling time is crucial! It helps the mixture firm up, making it easier to roll into truffles later. While you wait, you can take a moment to sip on some hot cocoa or catch up on your favorite holiday movie. You deserve a little break!
Step 4: Form the Truffles
Once the mixture has chilled, it’s time to get rolling—literally! Scoop out about 1 tablespoon of the mixture and roll it into a ball between your palms. Repeat this process until all the mixture is formed into truffles. Place each truffle on a baking sheet lined with parchment paper. Don’t worry if they’re not perfect; they’ll still taste amazing! Plus, a little imperfection adds to their charm.
Step 5: Melt the White Chocolate
Now, let’s get that white chocolate ready for coating! In a microwave-safe bowl, add the white chocolate chips. Microwave them in 30-second intervals, stirring in between, until they’re smooth and fully melted. Be careful not to overheat; burnt chocolate is a sad sight! If you prefer a different flavor, feel free to swap the white chocolate for milk chocolate chips. The choice is yours!
Step 6: Coat the Truffles
With your chocolate melted and ready, it’s time to coat those truffles! Take each truffle and dip it into the melted chocolate, ensuring it’s fully coated. Use a fork to lift the truffle out, allowing the excess chocolate to drip off. This step is where the magic happens—those truffles will look so inviting! Place the coated truffles back on the parchment-lined baking sheet.
Step 7: Decorate and Set
While the chocolate is still wet, it’s time to add some festive flair! Sprinkle your colorful sprinkles over the truffles for that holiday sparkle. This is where you can get creative—mix and match sprinkles for a fun look! Once decorated, let the truffles set at room temperature or refrigerate them for about 30 minutes until the chocolate hardens. And just like that, you’ve created a delightful treat that’s sure to impress!

Tips for Success
- Make sure your cream cheese is softened for easy mixing; it makes a world of difference!
- Don’t skip the chilling step; it helps the truffles hold their shape.
- Use a cookie scoop for even-sized truffles—no more guesswork!
- Experiment with different sprinkles or toppings for a personalized touch.
- Store any leftovers in an airtight container in the fridge for up to a week.
Equipment Needed
- Mixing Bowl: A large bowl for combining ingredients. A sturdy glass or ceramic bowl works great!
- Fork or Spatula: For crumbling and mixing. You can also use your hands for a more hands-on approach!
- Baking Sheet: A flat surface for setting the truffles. Parchment paper is a must to prevent sticking.
- Microwave-Safe Bowl: For melting chocolate. Any heat-safe bowl will do!
- Cookie Scoop: Optional, but it helps in forming uniform truffles.
Variations
- Chocolate Lovers: Swap the white chocolate for milk or dark chocolate for a richer flavor. You can even mix different types of chocolate for a marbled effect!
- Nutty Delight: Add chopped nuts like walnuts or pecans to the mixture for a delightful crunch. Just be sure to chop them finely so they blend well.
- Minty Fresh: Incorporate a few drops of peppermint extract into the cream cheese mixture for a refreshing twist. Perfect for the holiday season!
- Gluten-Free Option: Use gluten-free cake alternatives if you want to make these truffles suitable for gluten-sensitive friends or family.
- Vegan Version: Substitute the cream cheese with a vegan cream cheese alternative and use dairy-free chocolate chips for a plant-based treat.
Serving Suggestions
- Pair your Little Debbie Christmas Tree Cake Truffles with a warm cup of hot cocoa or a festive peppermint latte for a cozy treat.
- Present them on a decorative platter, garnished with fresh mint leaves or holiday-themed napkins for a festive touch.
- For a fun twist, serve them alongside a selection of holiday cookies for a delightful dessert spread.
FAQs about Little Debbie Christmas Tree Cake Truffles
As you embark on your journey to create these delightful Little Debbie Christmas Tree Cake Truffles, you might have a few questions. Don’t worry; I’ve got you covered! Here are some common queries that pop up when making these festive treats:
1. Can I make these truffles ahead of time?
Absolutely! These truffles can be made a day or two in advance. Just store them in an airtight container in the refrigerator. They’ll be just as delicious when you’re ready to serve them!
2. What if I can’t find Little Debbie Christmas Tree Cakes?
If you can’t find the Little Debbie Christmas Tree Cakes, don’t fret! You can substitute them with any similar cake or snack cake that has a festive flavor. Just make sure it’s soft enough to crumble easily!
3. How should I store the truffles?
Store your Little Debbie Christmas Tree Cake Truffles in an airtight container in the fridge. They’ll stay fresh for up to a week. Just be sure to separate layers with parchment paper to prevent sticking!
4. Can I freeze these truffles?
Yes, you can freeze them! Just place the truffles in a single layer on a baking sheet until frozen, then transfer them to an airtight container. They can be frozen for up to three months. Just thaw them in the fridge before serving!
5. What can I use instead of cream cheese?
If you’re looking for a dairy-free option, you can use a vegan cream cheese alternative. For a lighter version, try using Greek yogurt, but keep in mind it will change the flavor and texture slightly.
Final Thoughts
Making Little Debbie Christmas Tree Cake Truffles is more than just a recipe; it’s a delightful experience that brings joy to your holiday season. These truffles are a sweet reminder that even in the busiest times, we can create something special with minimal effort. The smiles on your loved ones’ faces as they indulge in these creamy bites will warm your heart. So, gather your ingredients, roll up your sleeves, and let the holiday spirit shine through your kitchen. Trust me, these truffles will become a cherished tradition in your home!
Print
Little Debbie Christmas Tree Cake Truffles delightfully easy!
Little Debbie Christmas Tree Cake Truffles are a delightful and easy treat perfect for the holiday season.
- Total Time: 1 hour
- Yield: 24 truffles 1x
Ingredients
- 2 boxes (12.7 oz each) Little Debbie Christmas Tree Cakes
- 8 oz cream cheese, softened
- 1 cup powdered sugar
- 1 teaspoon vanilla extract
- 1 cup white chocolate chips
- Sprinkles, for decoration
Instructions
- Begin by removing the Little Debbie Christmas Tree Cakes from their packaging and placing them in a large mixing bowl. Crumble the cakes into fine pieces using your hands or a fork.
- Add the softened cream cheese, powdered sugar, and vanilla extract to the crumbled cakes. Mix until well combined and a dough-like consistency forms.
- Once mixed, cover the bowl with plastic wrap and refrigerate for about 30 minutes to firm up the mixture.
- After chilling, scoop out about 1 tablespoon of the mixture and roll it into a ball. Repeat this process until all the mixture is formed into truffles. Place the truffles on a baking sheet lined with parchment paper.
- In a microwave-safe bowl, melt the white chocolate chips in 30-second intervals, stirring in between, until smooth and fully melted.
- Dip each truffle into the melted white chocolate, ensuring it is fully coated. Use a fork to lift the truffle out and let the excess chocolate drip off.
- Place the coated truffles back on the parchment-lined baking sheet. While the chocolate is still wet, sprinkle with festive sprinkles for decoration.
- Allow the truffles to set at room temperature or refrigerate for about 30 minutes until the chocolate hardens.
Notes
- For a richer flavor, try adding a teaspoon of almond extract to the cream cheese mixture.
- You can also substitute the white chocolate with milk chocolate for a different taste.
- Prep Time: 30 minutes
- Cook Time: 0 minutes
- Category: Dessert
- Method: No-Bake
- Cuisine: American
- Diet: Vegetarian
Nutrition
- Serving Size: 1 truffle
- Calories: 130
- Sugar: 14g
- Sodium: 0mg
- Fat: 7g
- Saturated Fat: 4g
- Unsaturated Fat: 0g
- Trans Fat: 0g
- Carbohydrates: 14g
- Fiber: 0g
- Protein: 1g
- Cholesterol: 0mg