

Introduction to Soft Christmas Peppermints Recipe
Ah, the holiday season! It’s that magical time of year when the air is filled with the scent of pine, and our hearts are warmed by the spirit of giving. If you’re like me, you want to create something special without spending hours in the kitchen. That’s where my Soft Christmas Peppermints Recipe comes in! These delightful treats are not only easy to whip up, but they also make perfect gifts or festive additions to your holiday spread. Plus, they’re a fun way to get the family involved in the kitchen. Let’s spread some cheer with these minty delights!
Why You’ll Love This Soft Christmas Peppermints Recipe
Let’s be honest—life gets busy, especially during the holidays! This Soft Christmas Peppermints Recipe is a lifesaver. It’s quick, taking just 20 minutes of your time, and requires no baking! The taste? Oh, it’s a delightful blend of creamy sweetness and refreshing mint that’ll have your family begging for more. Plus, they’re perfect for sharing, making them a wonderful way to spread holiday cheer without the stress!
Ingredients for Soft Christmas Peppermints Recipe
Gathering the right ingredients is half the fun of making these delightful treats! Here’s what you’ll need for my Soft Christmas Peppermints Recipe:
- Confectioners’ sugar: This is the star of the show! It gives our peppermints that sweet, melt-in-your-mouth texture.
- Sweetened condensed milk: This creamy ingredient adds richness and helps bind everything together, making the dough easy to work with.
- Peppermint oil: The essence of the holidays! A little goes a long way in delivering that refreshing minty flavor.
- Vanilla essence: This adds a warm, sweet note that balances the mint perfectly. Trust me, it’s a game-changer!
- Sea salt: Just a pinch enhances all the flavors, making your peppermints taste even more delicious.
- Red and green food dye (optional): Want to make your treats festive? A few drops of food dye can turn your dough into a holiday masterpiece!
- Granulated sugar for coating: This helps prevent sticking and adds a lovely sparkle to your finished peppermints.
For exact measurements, check the bottom of the article where you can find everything listed for easy printing. Happy cooking!
How to Make Soft Christmas Peppermints Recipe
Now that we have our ingredients ready, let’s dive into the fun part—making these delightful Soft Christmas Peppermints! Follow these simple steps, and you’ll have a batch of festive treats in no time. Trust me, it’s easier than you think!
Step 1: Prepare the Dough
Start by grabbing a spacious bowl. You’ll want plenty of room to mix! Combine the confectioners’ sugar, sweetened condensed milk, peppermint oil, vanilla essence, and sea salt. Use a sturdy spoon or your hands to mix everything together until you form a smooth, pliable dough. It should feel like a soft cloud—easy to work with and not too sticky. If it’s too crumbly, add a tiny splash of condensed milk. If it’s too sticky, sprinkle in a bit more confectioners’ sugar.
Step 2: Color the Dough
If you’re feeling festive, this step is where the magic happens! Divide your dough into two equal parts. Take one half and add a few drops of red food dye. Knead it until the color is vibrant and evenly distributed. Do the same with the green dye for the other half. It’s like playing with playdough, but way tastier! Don’t worry if the colors aren’t perfect; the charm is in the homemade look.
Step 3: Roll Out the Dough
Now, let’s get rolling! Lightly dust your countertop with granulated sugar to prevent sticking. This little trick adds a nice sparkle to your peppermints, too! Roll out the dough to about 1/4 inch thick. If you find it’s sticking, just sprinkle a bit more sugar on top. Aim for an even thickness so they all set nicely. Plus, it makes cutting shapes a breeze!
Step 4: Cut Out Shapes
Here comes the fun part—cutting out shapes! Use cookie cutters or a knife to create your preferred designs. Think festive stars, candy canes, or classic circles. The kids will love this part, so feel free to enlist their help! Arrange the cut shapes on a baking sheet lined with parchment paper. Make sure they’re not too close together; they need a little space to breathe.
Step 5: Let Them Set
Patience is key here! Once you’ve arranged your cut shapes, let them rest at room temperature for a full day. This allows them to harden and develop that perfect chewy texture. I know it’s tempting to sneak a taste, but trust me, waiting will be worth it! You’ll be rewarded with delightful minty treats that are sure to impress.
Step 6: Store Your Treats
Once your peppermints have set, it’s time to store them. Place your delightful minty treats in a sealed container at room temperature. They’ll stay fresh and ready to share with family and friends. Just remember to keep them in a cool, dry place to maintain their deliciousness. And there you have it—your very own batch of Soft Christmas Peppermints!

Tips for Success
- Make sure your dough is pliable; if it’s too dry, add a splash of condensed milk.
- Use granulated sugar for dusting instead of flour to keep the peppermint flavor intact.
- Don’t rush the setting time; letting them rest for a full day ensures the perfect texture.
- Get creative with shapes—use holiday-themed cookie cutters for extra fun!
- Store in a cool, dry place to keep them fresh and chewy.
Equipment Needed
- Mixing bowl: A large bowl works best; you can also use a stand mixer if you have one.
- Measuring cups: Essential for accuracy; a kitchen scale can be a handy alternative.
- Rolling pin: If you don’t have one, a wine bottle can do the trick!
- Cookie cutters: Use any shapes you have on hand; a knife works for cutting freehand.
- Baking sheet: A regular sheet pan lined with parchment paper will work perfectly.
Variations
- Chocolate Peppermint: Add cocoa powder to one half of the dough for a delicious chocolate twist. It pairs beautifully with the mint!
- Nut-Free Option: This recipe is naturally nut-free, making it a safe treat for those with nut allergies. Enjoy without worry!
- Vegan Version: Substitute sweetened condensed milk with coconut cream or a vegan sweetened condensed milk alternative for a plant-based treat.
- Spiced Peppermints: Add a pinch of cinnamon or nutmeg to the dough for a warm, spiced flavor that’s perfect for the holidays.
- Colorful Swirls: Instead of separating the dough, swirl the red and green together for a marbled effect that’s visually stunning!
Serving Suggestions
- Pair your Soft Christmas Peppermints with a warm cup of hot cocoa or peppermint tea for a cozy treat.
- Present them in a festive tin or on a decorative platter for a charming holiday display.
- Include them in gift baskets alongside homemade cookies or other sweet treats for a delightful surprise.
- Serve as a sweet finish to your holiday dinner, adding a minty touch to the meal.
FAQs about Soft Christmas Peppermints Recipe
As you embark on your journey to create these delightful Soft Christmas Peppermints, you might have a few questions. Don’t worry; I’ve got you covered! Here are some common queries that pop up when making these festive treats:
1. Can I use regular sugar instead of confectioners’ sugar?
While you could try it, I highly recommend sticking with confectioners’ sugar. It gives the peppermints that smooth, melt-in-your-mouth texture that makes them so special. Regular sugar might make them grainy, and we want to avoid that!
2. How long do these peppermints last?
When stored properly in a sealed container at room temperature, your Soft Christmas Peppermints can last for about two weeks. Just make sure to keep them in a cool, dry place to maintain their freshness and chewy texture.
3. Can I make these peppermints ahead of time?
Absolutely! In fact, making them a few days in advance is a great idea. They’ll have time to set and develop their flavors. Just store them in an airtight container, and you’ll be all set for your holiday gatherings!
4. What if I don’t have peppermint oil?
No peppermint oil? No problem! You can substitute it with peppermint extract, but use a bit more since the flavor is milder. Start with 1/2 teaspoon and adjust to taste. Your Soft Christmas Peppermints will still be delicious!
5. Can I freeze these peppermints?
While I recommend enjoying them fresh, you can freeze your peppermints if needed. Just layer them between parchment paper in an airtight container. When you’re ready to enjoy, let them thaw at room temperature. They might lose a bit of their texture, but they’ll still taste great!
Final Thoughts
Making these Soft Christmas Peppermints is more than just a recipe; it’s a delightful experience that brings joy to your kitchen and warmth to your heart. The laughter shared while rolling out the dough, the excitement of cutting out festive shapes, and the anticipation of that first minty bite create lasting memories with loved ones. Plus, these treats are perfect for gifting or adding a sweet touch to your holiday gatherings. So, roll up your sleeves, gather your family, and let’s make this holiday season a little sweeter together!
Print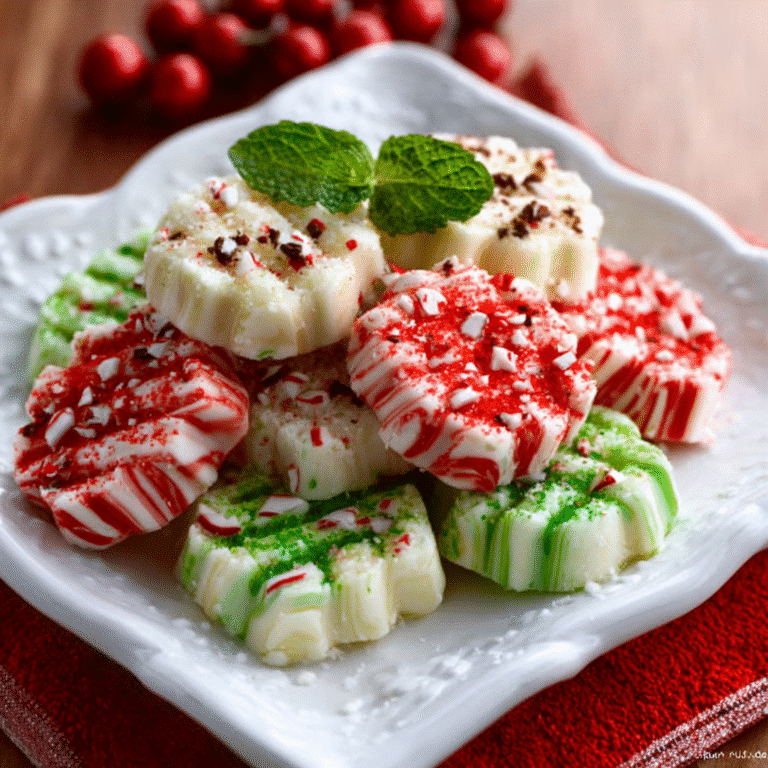
Soft Christmas Peppermints Recipe: Make Festive Treats Now!
A delightful recipe for soft Christmas peppermints that are perfect for the festive season.
- Total Time: 1 day
- Yield: Approximately 24 pieces 1x
Ingredients
- 2 cups confectioners’ sugar
- 1/2 cup sweetened condensed milk
- 1/4 teaspoon peppermint oil
- 1/4 teaspoon vanilla essence
- 1/4 teaspoon sea salt
- Red and green food dye (optional)
- Granulated sugar for coating
Instructions
- Mix the confectioners’ sugar, sweetened condensed milk, peppermint oil, vanilla essence, and sea salt in a spacious bowl until a smooth, pliable dough is formed.
- If desired, separate the dough into two equal parts and add a few drops of red dye to one half and green dye to the other, kneading each until the colors are vibrant and evenly distributed.
- Lightly dust your countertop with granulated sugar to prevent sticking, then roll the dough out to about 1/4 inch thick.
- Use cookie cutters or a knife to create your preferred shapes, such as festive stars or classic circles.
- Arrange the cut shapes on a baking sheet lined with parchment paper and allow them to rest at room temperature for a full day to harden.
- Once they have set, store your delightful minty treats in a sealed container at room temperature.
Notes
- Ensure the dough is pliable for easy shaping.
- Adjust the amount of food dye based on desired color intensity.
- Store in a cool, dry place to maintain freshness.
- Prep Time: 20 minutes
- Cook Time: 0 minutes
- Category: Dessert
- Method: No-bake
- Cuisine: American
- Diet: Vegetarian
Nutrition
- Serving Size: 1 piece
- Calories: 50
- Sugar: 10g
- Sodium: 15mg
- Fat: 1g
- Saturated Fat: 0g
- Unsaturated Fat: 0g
- Trans Fat: 0g
- Carbohydrates: 12g
- Fiber: 0g
- Protein: 0g
- Cholesterol: 0mg