
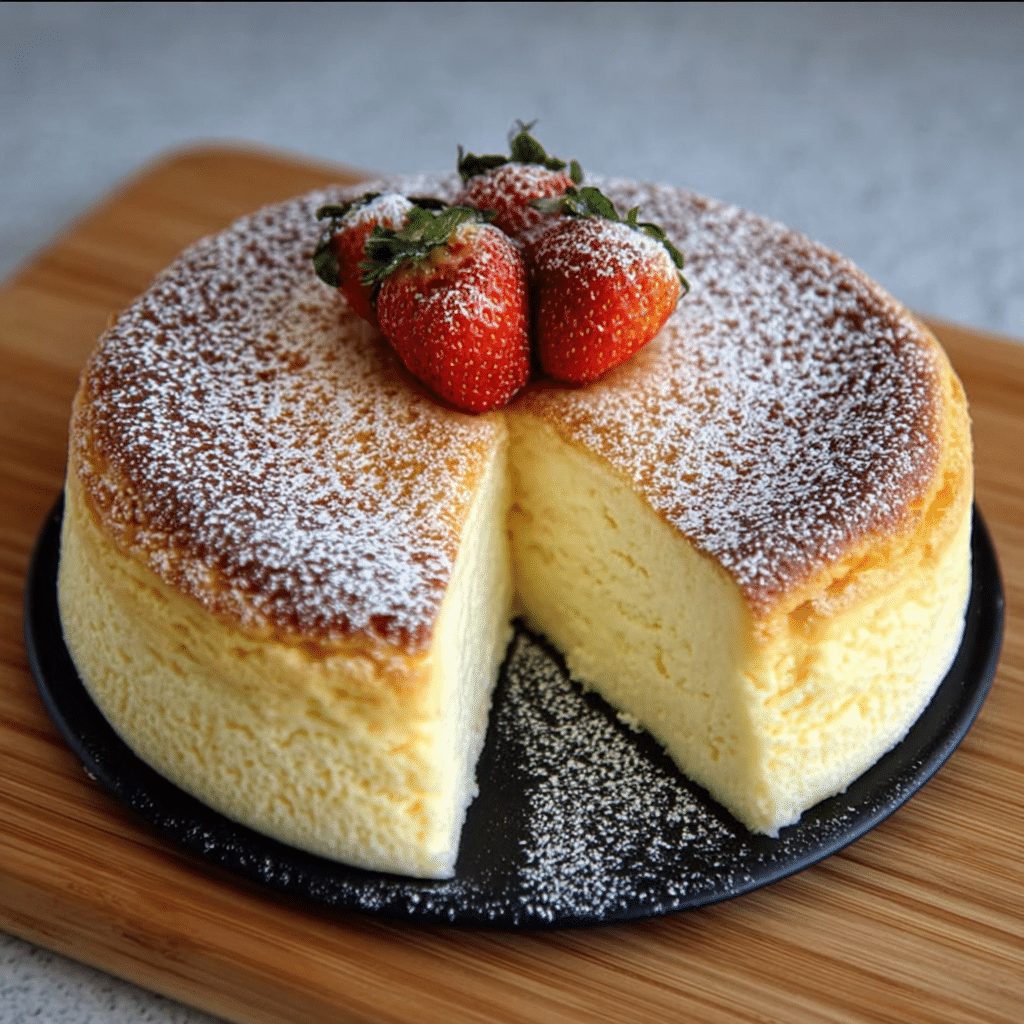
Introduction to Japanese Cotton Cheesecake
Hey there, fellow dessert lovers! If you’re anything like me, you know that life can get pretty hectic, especially when juggling family, work, and everything in between. That’s why I’m excited to share my take on the delightful Japanese Cotton Cheesecake. This fluffy treat is not just a dessert; it’s a little slice of heaven that melts in your mouth! Perfect for impressing guests or simply indulging after a long day, this cheesecake is surprisingly easy to whip up. Trust me, your loved ones will be begging for seconds!
Why You’ll Love This Japanese Cotton Cheesecake
Let me tell you, this Japanese Cotton Cheesecake is a game-changer! It’s not only light and airy, but it also comes together in no time, making it perfect for busy days. The taste? Oh, it’s like a sweet cloud that dances on your tongue! Plus, it’s a fantastic way to impress family and friends without spending hours in the kitchen. You’ll feel like a culinary rockstar with minimal effort!
Ingredients for Japanese Cotton Cheesecake
Now, let’s dive into the ingredients that make this Japanese Cotton Cheesecake so special. Each component plays a vital role in creating that fluffy, melt-in-your-mouth texture we all crave. Here’s what you’ll need:
- Cream Cheese: The star of the show! Softened cream cheese gives the cheesecake its rich, creamy base. Make sure it’s at room temperature for easy blending.
- Granulated Sugar: This sweetener balances the tanginess of the cream cheese, adding just the right amount of sweetness to your dessert.
- Whole Milk: Adds moisture and helps create that light texture. You can substitute with almond or oat milk if you prefer a dairy-free option.
- Unsalted Butter: Melted butter enriches the batter and adds a lovely flavor. If you’re watching your fat intake, you can use a light butter or even applesauce for a healthier twist.
- Vanilla Extract: A splash of vanilla enhances the overall flavor, making each bite even more delightful. Feel free to use pure vanilla for the best taste.
- Eggs: You’ll need large eggs, separated into yolks and whites. The yolks add richness, while the whipped whites create that airy texture we love.
- All-Purpose Flour: This helps to stabilize the cheesecake while keeping it light. If you’re gluten-free, you can swap it out for a gluten-free flour blend.
- Cornstarch: This ingredient helps to create a tender crumb and adds to the fluffiness. It’s a secret weapon in achieving that perfect texture!
- Salt: Just a pinch enhances the flavors and balances the sweetness.
- Cream of Tartar: This is optional but recommended! It helps stabilize the egg whites, ensuring they whip up to those glorious stiff peaks.
For those adventurous souls, consider adding a twist! You can replace half of the cream cheese with Greek yogurt for a tangy flavor or fold in some lemon zest or matcha powder for a unique twist. The possibilities are endless!
For exact measurements, check the bottom of the article where you can find everything listed for easy printing. Let’s get ready to bake this fluffy delight!
How to Make Japanese Cotton Cheesecake
Now that we have our ingredients ready, let’s dive into the fun part—making this delightful Japanese Cotton Cheesecake! Follow these simple steps, and you’ll be on your way to creating a dessert that’s sure to impress.
Step 1: Preheat and Prepare
First things first, preheat your oven to 320°F (160°C). While that’s warming up, grab an 8-inch round cake pan. Grease it well and line the bottom with parchment paper. This little trick ensures your cheesecake comes out easily and doesn’t stick. Trust me, you’ll thank yourself later!
Step 2: Cream the Cheese
In a large mixing bowl, add your softened cream cheese. Using a hand mixer or a stand mixer, blend it until it’s silky smooth. Gradually sprinkle in the granulated sugar, mixing until it’s fully incorporated. You want this mixture to be creamy and free of lumps—like a soft cloud ready to take flight!
Step 3: Mix in Wet Ingredients
Next, pour in the whole milk, melted butter, and vanilla extract. Stir everything together until it’s smooth and creamy. The aroma of vanilla wafting through your kitchen is just heavenly! This mixture is the base of your Japanese Cotton Cheesecake, so make sure it’s well combined.
Step 4: Incorporate Egg Yolks
Now, let’s add some richness! In a separate bowl, whisk the egg yolks until they’re light and airy. Slowly add these yolks to your cream cheese mixture, stirring gently until everything is well blended. This step adds a lovely depth of flavor to your cheesecake.
Step 5: Fold in Dry Ingredients
Time to sift together the all-purpose flour, cornstarch, and salt. Gently fold this dry mixture into your cream cheese blend. Be careful not to overmix; you want to keep that light texture. It’s like tucking a fluffy blanket around your cheesecake batter!
Step 6: Whip Egg Whites
In a clean bowl, whip the egg whites with the cream of tartar until stiff peaks form. This is where the magic happens! The whipped egg whites will give your cheesecake that airy, fluffy texture we all love. Just be patient and keep whipping until you see those peaks standing tall!
Step 7: Combine Mixtures
Now, it’s time to bring it all together. Carefully fold the whipped egg whites into the cream cheese batter in three parts. Use a gentle hand here; you don’t want to deflate all that lovely air you just whipped into the egg whites. It’s like a dance—slow and graceful!
Step 8: Bake
Transfer your batter into the prepared cake pan. Here’s a little secret: place this pan inside a larger baking dish filled with hot water, halfway up the sides of the cake pan. This water bath helps the cheesecake bake evenly and prevents cracking. Bake for 55-60 minutes until it’s golden brown and a toothpick inserted comes out clean. Your kitchen will smell divine!
Step 9: Cool and Serve
Once baked, turn off the oven and let the cheesecake sit inside for about 15 minutes. This gentle cooling helps prevent it from sinking. After that, cool it in the pan for another 10 minutes. Use a knife to loosen the edges, then flip it onto a serving plate and peel away the parchment paper. Allow it to cool completely before slicing. And there you have it—your very own fluffy Japanese Cotton Cheesecake ready to be devoured!

Tips for Success
- Make sure your cream cheese is at room temperature for easy blending.
- Whip egg whites in a clean, dry bowl to achieve maximum volume.
- Be gentle when folding in the egg whites to maintain that fluffy texture.
- Use a water bath to prevent cracking and ensure even baking.
- Let the cheesecake cool gradually to avoid sinking in the middle.
Equipment Needed
- 8-inch Round Cake Pan: Essential for baking. If you don’t have one, a springform pan works too!
- Mixing Bowls: A couple of medium-sized bowls will do. You can use any size you have on hand.
- Hand Mixer or Stand Mixer: For blending the cream cheese and whipping egg whites. A whisk can work in a pinch!
- Parchment Paper: Helps with easy removal. If you’re out, just grease the pan well.
- Measuring Cups and Spoons: For accurate ingredient measurements. A kitchen scale is a great alternative!
Variations
- Greek Yogurt Twist: Swap half of the cream cheese with Greek yogurt for a tangy flavor and a bit of extra protein.
- Citrus Zing: Add the zest of one lemon or orange to the batter for a refreshing citrus kick that brightens the cheesecake.
- Matcha Magic: Incorporate 1-2 teaspoons of matcha powder into the batter for a unique flavor and a beautiful green hue.
- Chocolate Delight: Fold in some melted dark chocolate or cocoa powder for a rich chocolate version of this fluffy cheesecake.
- Berry Bliss: Top your cheesecake with fresh berries or a berry compote for a fruity finish that adds color and flavor.
- Gluten-Free Option: Use a gluten-free flour blend instead of all-purpose flour to make this cheesecake suitable for gluten-sensitive friends.
Serving Suggestions
- Fresh Berries: Serve with a handful of strawberries, blueberries, or raspberries for a pop of color and flavor.
- Whipped Cream: A dollop of freshly whipped cream adds a luxurious touch.
- Green Tea: Pair with a warm cup of green tea for a delightful Japanese-inspired experience.
- Presentation: Dust with powdered sugar or drizzle with chocolate sauce for an elegant finish.
FAQs about Japanese Cotton Cheesecake
As you embark on your journey to create this delightful Japanese Cotton Cheesecake, you might have a few questions. Don’t worry; I’ve got you covered! Here are some common queries that might pop up:
1. What makes Japanese Cotton Cheesecake different from regular cheesecake?
Great question! The main difference lies in the texture. While traditional cheesecakes are dense and rich, Japanese Cotton Cheesecake is light, airy, and fluffy, almost like a soufflé. This unique texture comes from whipping the egg whites to stiff peaks and folding them into the batter, creating that melt-in-your-mouth experience.
2. Can I make this cheesecake ahead of time?
Absolutely! In fact, making it a day in advance can enhance the flavors. Just be sure to store it in the refrigerator, covered, to keep it fresh. When you’re ready to serve, let it sit at room temperature for a bit before slicing. Your guests will love it!
3. How do I know when my cheesecake is done baking?
To check for doneness, look for a golden brown top and a toothpick inserted into the center should come out clean or with just a few moist crumbs. Remember, it will continue to set as it cools, so don’t worry if it seems a bit jiggly when you first take it out of the oven.
4. Can I use low-fat cream cheese for this recipe?
Yes, you can! Using low-fat cream cheese will still yield a delicious Japanese Cotton Cheesecake, though the texture might be slightly different. It may not be as rich, but it’s a great option if you’re looking to cut back on calories.
5. What should I do if my cheesecake cracks while baking?
Cracking can happen, but don’t fret! To prevent it, make sure to use a water bath during baking, as it helps regulate the temperature. If it does crack, you can always cover it with a dusting of powdered sugar or a fruit topping to hide those imperfections. It’ll still taste amazing!
Final Thoughts
Creating a Japanese Cotton Cheesecake is more than just baking; it’s about bringing joy to your kitchen and delighting your loved ones. The process is simple, yet the results are nothing short of spectacular. Each fluffy slice is a reminder that even on the busiest days, you can whip up something truly special. Whether you’re celebrating a special occasion or just treating yourself after a long week, this cheesecake is sure to bring smiles all around. So, roll up your sleeves, embrace the joy of baking, and enjoy every delicious bite of your fluffy masterpiece!
Print
Japanese Cotton Cheesecake: Uncover Fluffy Delight!
Discover the fluffy delight of Japanese Cotton Cheesecake, a light and airy dessert that melts in your mouth.
- Total Time: 80 minutes
- Yield: 8 servings 1x
Ingredients
- 3 (8-ounce) packages of softened cream cheese
- 1 cup granulated sugar
- 1/2 cup whole milk
- 1/4 cup unsalted butter, melted
- 1 teaspoon vanilla extract
- 6 large eggs, separated
- 1/4 cup all-purpose flour
- 1/4 cup cornstarch
- 1/4 teaspoon salt
- 1/4 teaspoon cream of tartar
Instructions
- Preheat your oven to 320°F (160°C) and prepare an 8-inch round cake pan by greasing it and lining the base with parchment paper.
- In a large bowl, blend the softened cream cheese until silky, then gradually mix in the granulated sugar.
- Pour in the milk, melted butter, and vanilla extract, stirring until smooth and creamy.
- In a separate bowl, whisk the egg yolks until light and airy, then slowly add them to the cream cheese mixture.
- Sift together the flour, cornstarch, and salt, then gently fold this into the cream cheese blend until just combined.
- In a clean bowl, whip the egg whites with cream of tartar until stiff peaks form, then carefully fold into the cream cheese batter in three parts.
- Transfer the batter into the prepared cake pan and place it inside a larger baking dish filled with hot water halfway up the sides of the cake pan.
- Bake for 55-60 minutes until golden brown and a toothpick inserted comes out clean. Turn off the oven and let it sit for 15 minutes.
- Cool in the pan for 10 minutes, loosen the edges with a knife, flip onto a serving plate, and peel away the parchment paper. Allow to cool completely before slicing and serving.
Notes
- For a twist, replace half of the cream cheese with Greek yogurt.
- Add lemon zest or matcha powder for extra flavor.
- Prep Time: 20 minutes
- Cook Time: 60 minutes
- Category: Dessert
- Method: Baking
- Cuisine: Japanese
- Diet: Vegetarian
Nutrition
- Serving Size: 1 slice
- Calories: 220
- Sugar: 7g
- Sodium: 200mg
- Fat: 17g
- Saturated Fat: 10g
- Unsaturated Fat: 7g
- Trans Fat: 0g
- Carbohydrates: 7g
- Fiber: 0g
- Protein: 6g
- Cholesterol: 150mg