
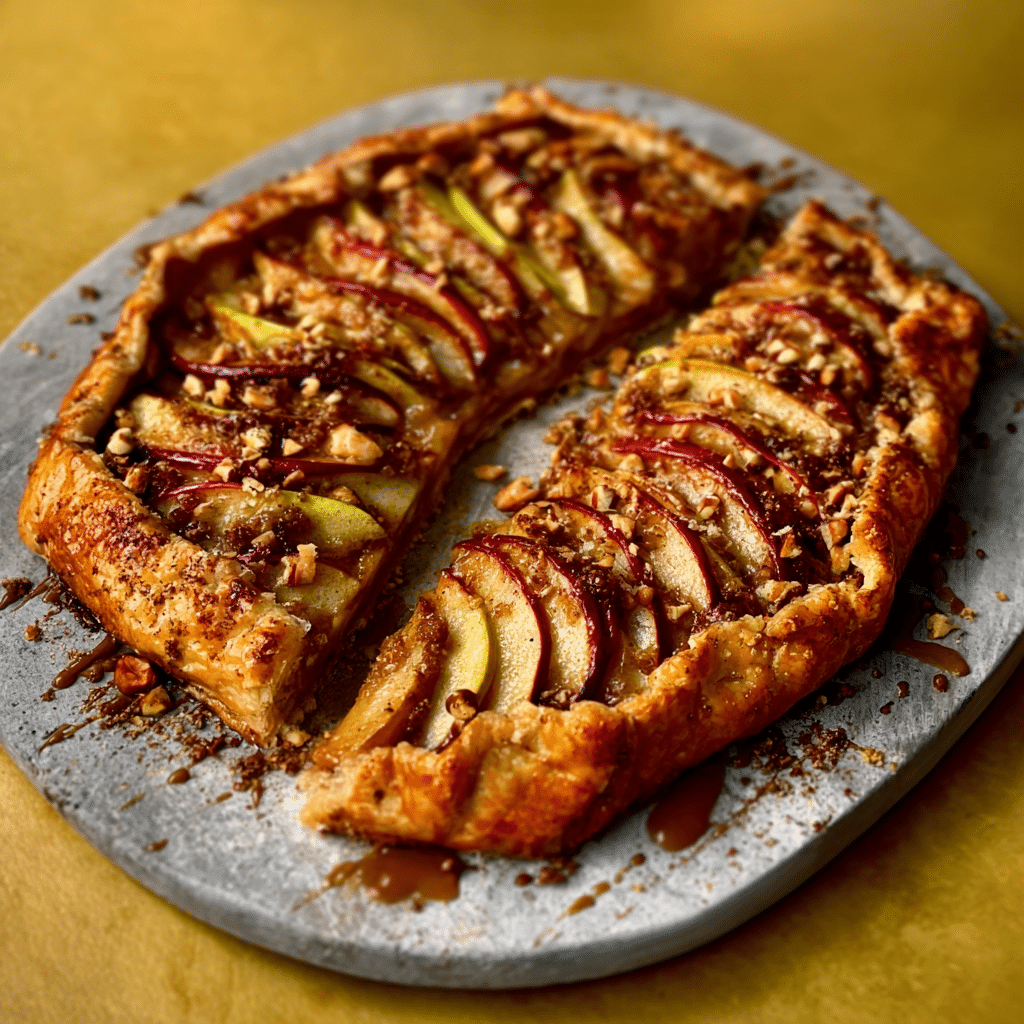
Introduction to Apple Hazelnut Butter Galettes
Hey there, fellow home cooks! If you’re anything like me, you know that life can get a bit hectic, especially when juggling family, work, and everything in between. That’s why I’m excited to share this delightful recipe for Apple Hazelnut Butter Galettes. It’s a quick solution for those busy days when you want to whip up something special without spending hours in the kitchen. These galettes are not only easy to make, but they also combine the sweet, comforting flavors of apples with the rich, nutty goodness of hazelnut butter. Trust me, your loved ones will be impressed!
Why You’ll Love This Apple Hazelnut Butter Galettes
Let me tell you, these Apple Hazelnut Butter Galettes are a game-changer! They’re incredibly easy to make, which is a blessing for busy women like us. In just about 40 minutes, you can have a warm, delicious dessert that feels fancy but requires minimal effort. Plus, the combination of sweet apples and creamy hazelnut butter is simply divine. It’s the perfect treat to brighten up your day or impress guests without breaking a sweat!
Ingredients for Apple Hazelnut Butter Galettes
Gathering the right ingredients is half the fun of cooking! For these Apple Hazelnut Butter Galettes, you’ll need a few simple items that you might already have in your kitchen. Here’s what you’ll need:
- Apples: Choose two large apples, like Granny Smith or Honeycrisp, for a perfect balance of sweetness and tartness. They’ll be the star of your galettes!
- Lemon Juice: Just a tablespoon will do! This brightens the flavor of the apples and helps prevent browning.
- Granulated Sugar: A couple of tablespoons will sweeten the apples just right. You can adjust this based on your taste or the sweetness of your apples.
- Ground Cinnamon: This warm spice adds a cozy flavor that pairs beautifully with apples. It’s like a hug in dessert form!
- All-Purpose Flour: A tablespoon helps to thicken the apple mixture, ensuring it doesn’t get too runny while baking.
- Hazelnut Butter: This is the creamy goodness that makes these galettes special! If you can’t find hazelnut butter, almond or peanut butter can work as tasty substitutes.
- Pre-Made Pie Crust: To save time, grab a store-bought crust. If you’re feeling adventurous, a homemade crust can add a personal touch!
- Egg (for egg wash): A beaten egg brushed on the crust gives it a beautiful golden color when baked.
- Coarse Sugar: A sprinkle on top adds a delightful crunch and sweetness to the finished galettes.
For those who like a little extra sweetness, consider adding a tablespoon of honey or maple syrup to the apple mixture. And if you want to mix things up, feel free to experiment with different nut butters for a unique flavor twist!
Don’t worry about memorizing all these ingredients; you can find the exact quantities at the bottom of the article, ready for printing. Happy cooking!
How to Make Apple Hazelnut Butter Galettes
Now that we have our ingredients ready, let’s dive into the fun part—making these delightful Apple Hazelnut Butter Galettes! Follow these simple steps, and you’ll have a delicious dessert that will make your kitchen smell heavenly.
Step 1: Preheat the Oven
First things first, let’s get that oven preheated to 400°F. Preheating is crucial because it ensures that your galettes bake evenly and develop that lovely golden crust we all adore. Think of it as warming up your kitchen for the deliciousness to come!
Step 2: Prepare the Apples
Next, grab those beautiful apple slices and toss them in a large bowl with the lemon juice, granulated sugar, ground cinnamon, and flour. This step is all about flavor! The lemon juice brightens the apples, while the sugar and cinnamon create a sweet, aromatic mixture. The flour helps absorb any excess moisture, so your galettes don’t turn into a soggy mess. Let the apples marinate for about 10 minutes. This little wait is worth it, as it allows the flavors to meld beautifully!
Step 3: Roll Out the Pie Crust
Now, let’s roll out that pie crust! If you’re using a store-bought crust, simply unroll it on a lightly floured surface. If you’re feeling adventurous and making your own, roll it out to about 1/8 inch thick. Using a sharp knife or a round cutter, cut the dough into four equal circles, each about 6 inches in diameter. Don’t stress if they’re not perfect circles; rustic is the name of the game here!
Step 4: Assemble the Galettes
Time to bring it all together! Spread about 1/4 cup of hazelnut butter in the center of each dough circle, leaving about a 1-inch border around the edges. This creamy layer is what makes these Apple Hazelnut Butter Galettes so special! Next, arrange the marinated apple slices on top of the hazelnut butter, overlapping them slightly for a beautiful presentation. It’s like creating a work of art, but edible!
Step 5: Fold and Brush
Now, let’s fold those edges! Gently fold the edges of the dough over the apples, pleating as necessary to create a rustic edge. This doesn’t have to be perfect; the charm of galettes lies in their imperfections! Once you’ve folded the edges, brush the exposed dough with the beaten egg. This egg wash will give your galettes that gorgeous golden color when they bake. Sprinkle a little coarse sugar on top for an extra touch of sweetness and crunch!
Step 6: Bake the Galettes
Place your assembled galettes on a parchment-lined baking sheet and pop them in the oven. Bake for 25-30 minutes, or until the crust is golden brown and the apples are tender. Keep an eye on them; your kitchen will start to smell amazing, and you’ll know they’re close to being done when the edges are beautifully browned!
Step 7: Cool and Serve
Once they’re out of the oven, let the galettes cool for a few minutes. This waiting period is tough, I know, but it helps the filling set a bit. You can enjoy them warm or at room temperature, whichever you prefer! Serve them as is, or with a scoop of vanilla ice cream for an extra special treat. Trust me, your family will be asking for seconds!
Tips for Success
- Use a mix of sweet and tart apples for a balanced flavor.
- Don’t skip the marinating step; it enhances the apple flavor.
- Keep your pie crust cold for a flakier texture.
- Experiment with spices like nutmeg or ginger for a unique twist.
- Make extra galettes and freeze them for a quick dessert later!
Equipment Needed
- Baking Sheet: A standard baking sheet works perfectly. If you don’t have one, a large oven-safe dish will do.
- Parchment Paper: This helps prevent sticking. If you’re out, lightly greasing the baking sheet is a good alternative.
- Mixing Bowl: Any large bowl will suffice for mixing the apple filling.
- Rolling Pin: If you don’t have one, a wine bottle can work in a pinch!
- Sharp Knife: Essential for slicing apples; a vegetable peeler is handy for peeling.
Variations
- Nut Butter Alternatives: If hazelnut butter isn’t your thing, try almond or peanut butter for a different flavor profile.
- Fruit Mix-Ins: Add other fruits like pears or berries for a delightful twist on the classic apple filling.
- Gluten-Free Option: Use a gluten-free pie crust to make these galettes suitable for those with gluten sensitivities.
- Vegan Version: Substitute the egg wash with a plant-based milk for brushing, and use a vegan pie crust.
- Spice It Up: Experiment with spices like nutmeg, ginger, or cardamom to add warmth and depth to the flavor.
Serving Suggestions
- Pair with Ice Cream: A scoop of vanilla or caramel ice cream on the side elevates the dessert experience.
- Serve with Whipped Cream: A dollop of freshly whipped cream adds a light, airy touch.
- Accompany with Tea or Coffee: Enjoy these galettes with a warm cup of tea or coffee for a cozy treat.
- Garnish with Nuts: Sprinkle chopped hazelnuts on top for added crunch and flavor.
- Presentation: Serve on a rustic wooden board for a charming, homemade feel.
FAQs about Apple Hazelnut Butter Galettes
As you embark on your journey to make these delightful Apple Hazelnut Butter Galettes, you might have a few questions. Don’t worry; I’ve got you covered! Here are some common queries that pop up, along with my friendly advice.
1. Can I use different types of apples for this recipe?
Absolutely! While I love using Granny Smith or Honeycrisp for their perfect balance of sweet and tart, feel free to experiment with your favorites. Fuji, Gala, or even a mix of apples can add unique flavors to your Apple Hazelnut Butter Galettes.
2. How do I store leftover galettes?
If you happen to have any leftovers (which is rare in my house!), simply store them in an airtight container at room temperature for up to two days. You can also refrigerate them for up to a week. Just reheat in the oven for a few minutes to bring back that fresh-baked goodness!
3. Can I make the galettes ahead of time?
Yes, you can! Prepare the galettes up to the baking step, then cover and refrigerate them for a few hours or overnight. When you’re ready to bake, just pop them in the oven straight from the fridge. They’ll be just as delicious!
4. What can I substitute for hazelnut butter?
If hazelnut butter isn’t available, don’t fret! Almond butter or peanut butter can be great alternatives. Each will bring its own unique flavor to the Apple Hazelnut Butter Galettes, so feel free to get creative!
5. Can I freeze the galettes?
Yes, you can freeze them! After baking, let the galettes cool completely, then wrap them tightly in plastic wrap and place them in a freezer-safe bag. They can be frozen for up to three months. When you’re ready to enjoy, just thaw and reheat in the oven!
Final Thoughts
Making Apple Hazelnut Butter Galettes is more than just baking; it’s about creating a moment of joy in your busy life. The aroma of sweet apples and nutty hazelnut butter wafting through your kitchen is like a warm hug on a chilly day. Whether you’re sharing them with family or enjoying a quiet moment to yourself, these galettes bring a sense of comfort and satisfaction. Plus, they’re so easy to whip up that you’ll find yourself making them again and again. So, roll up your sleeves, and let’s get baking—your taste buds will thank you!
PrintApple Hazelnut Butter Galettes: A Deliciously Easy Recipe
A deliciously easy recipe for Apple Hazelnut Butter Galettes that combines the sweetness of apples with the rich flavor of hazelnut butter.
- Total Time: 40 minutes
- Yield: 4 servings 1x
Ingredients
- 2 large apples, peeled, cored, and thinly sliced
- 1 tablespoon lemon juice
- 2 tablespoons granulated sugar
- 1 teaspoon ground cinnamon
- 1 tablespoon all-purpose flour
- 1 cup hazelnut butter
- 1 pre-made pie crust (store-bought or homemade)
- 1 egg, beaten (for egg wash)
- 1 tablespoon coarse sugar (for sprinkling)
Instructions
- Preheat the oven to 400°F.
- In a large bowl, toss the sliced apples with lemon juice, granulated sugar, cinnamon, and flour until well coated. Set aside to marinate for about 10 minutes.
- Roll out the pie crust on a lightly floured surface to about 1/8 inch thick. Cut the dough into four equal circles, about 6 inches in diameter.
- Spread about 1/4 cup of hazelnut butter in the center of each dough circle, leaving a 1-inch border around the edges.
- Arrange the marinated apple slices on top of the hazelnut butter, overlapping them slightly.
- Fold the edges of the dough over the apples, pleating as necessary to create a rustic edge. Brush the exposed dough with the beaten egg and sprinkle with coarse sugar.
- Place the galettes on a parchment-lined baking sheet and bake for 25-30 minutes, or until the crust is golden brown and the apples are tender.
- Let the galettes cool for a few minutes before serving. Enjoy warm or at room temperature.
Notes
- For a sweeter galette, add a tablespoon of honey or maple syrup to the apple mixture.
- Try using different nut butters, like almond or peanut butter, for a unique flavor twist.
- Prep Time: 10 minutes
- Cook Time: 25-30 minutes
- Category: Dessert
- Method: Baking
- Cuisine: American
- Diet: Vegetarian
Nutrition
- Serving Size: 1 galette
- Calories: 320
- Sugar: 15g
- Sodium: 0mg
- Fat: 15g
- Saturated Fat: 0g
- Unsaturated Fat: 0g
- Trans Fat: 0g
- Carbohydrates: 35g
- Fiber: 0g
- Protein: 6g
- Cholesterol: 0mg