
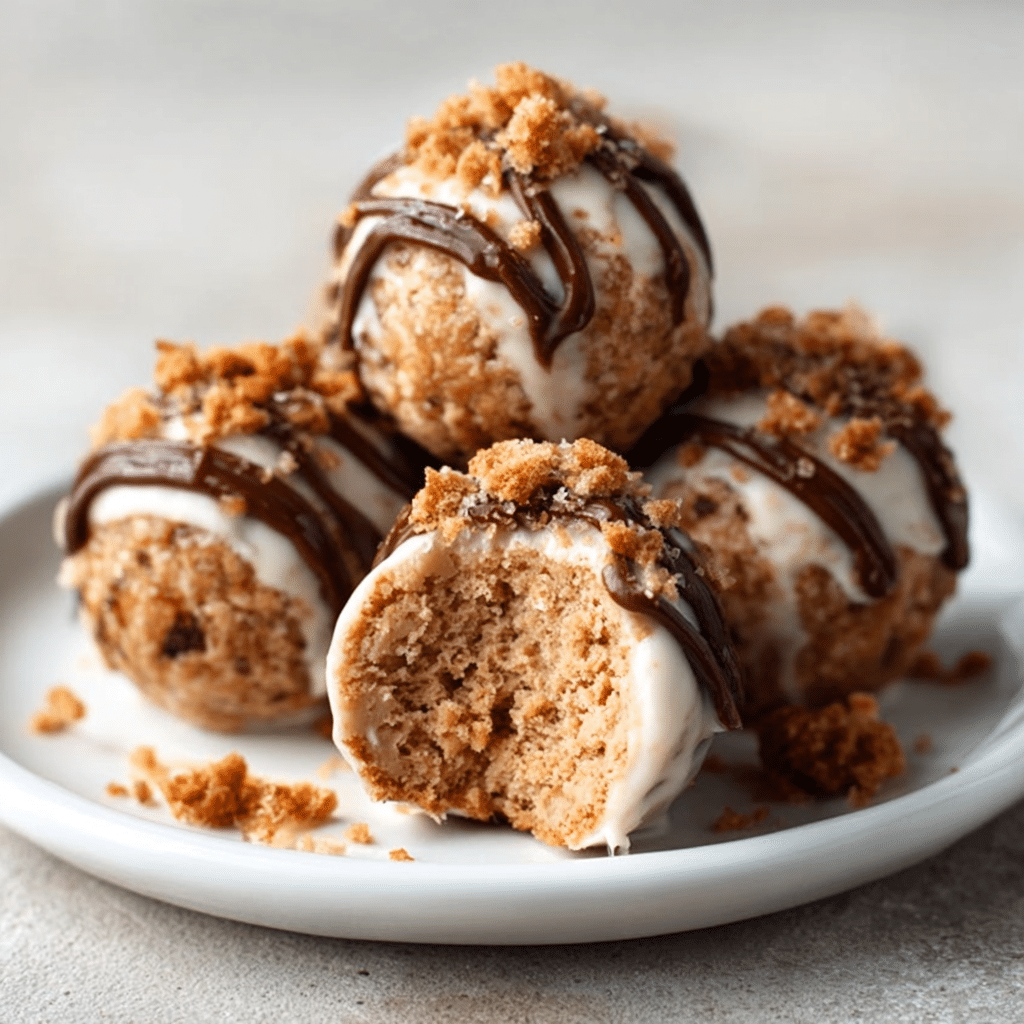
Introduction to Nutritious Biscoff Cheesecake Protein Balls
Hey there, fellow food lovers! If you’re anything like me, you know how hectic life can get, especially when juggling family, work, and everything in between. That’s why I’m excited to share my recipe for Nutritious Biscoff Cheesecake Protein Balls! These little bites of heaven are not only delicious but also a quick solution for those busy days when you need a pick-me-up. Imagine indulging in a creamy, dreamy treat that’s packed with protein and goodness. Trust me, your taste buds and your body will thank you for this delightful snack!
Why You’ll Love This Nutritious Biscoff Cheesecake Protein Balls
Let’s be real—life is busy, and we all need a little help in the kitchen! These Nutritious Biscoff Cheesecake Protein Balls are not only super easy to whip up, but they also taste like a decadent dessert without the guilt. In just 10 minutes of prep time, you’ll have a delicious snack that’s perfect for on-the-go munching or a sweet treat after dinner. Plus, they’re a hit with the whole family!
Ingredients for Nutritious Biscoff Cheesecake Protein Balls
Before we dive into the fun of making these Nutritious Biscoff Cheesecake Protein Balls, let’s gather our ingredients! Each one plays a vital role in creating that irresistible flavor and texture. Here’s what you’ll need:
- Rolled oats: These are the base of our protein balls, providing a hearty texture and a good dose of fiber to keep you feeling full.
- Vanilla protein powder: This adds a protein punch, making these bites not just tasty but also a great post-workout snack or a midday energy boost.
- Biscoff spread: The star of the show! This creamy, spiced spread gives our protein balls that signature Biscoff flavor that’s simply irresistible.
- Cream cheese: Softened cream cheese adds a rich, creamy texture that makes these protein balls feel indulgent without the guilt.
- Honey or maple syrup: A touch of sweetness to balance the flavors. You can choose honey for a classic taste or maple syrup for a vegan option.
- Crushed Biscoff cookies: These not only add crunch but also enhance the Biscoff flavor. Plus, they’re perfect for rolling the balls in for that extra touch of sweetness!
- Vanilla extract: A splash of this aromatic extract elevates the flavor profile, making every bite taste like a little piece of heaven.
- Salt: Just a pinch helps to enhance all the flavors and brings everything together beautifully.
For those of you who might have dietary restrictions or preferences, here are a couple of substitutions:
- If you’re looking for a chocolate twist, feel free to swap out half of the Biscoff spread with chocolate hazelnut spread. It’s a delightful variation!
- For a nut-free version, simply use sunflower seed butter instead of Biscoff spread. It works like a charm!
Don’t worry about memorizing these ingredients; you can find the exact quantities at the bottom of the article, ready for printing. Now, let’s get ready to create some deliciousness!
How to Make Nutritious Biscoff Cheesecake Protein Balls
Now that we have our ingredients ready, let’s dive into the fun part—making these Nutritious Biscoff Cheesecake Protein Balls! I promise, it’s as easy as pie (or should I say, as easy as protein balls?). Follow these simple steps, and you’ll have a delicious snack in no time!
Step 1: Combine Dry Ingredients
Start by grabbing a large mixing bowl. Toss in the rolled oats, vanilla protein powder, and a pinch of salt. Give it a good stir until everything is well mixed. This step is crucial because it ensures that the protein powder and oats are evenly distributed, making every bite just as tasty as the last!
Step 2: Mix Wet Ingredients
In a separate bowl, it’s time to bring the magic together! Blend the Biscoff spread, softened cream cheese, honey (or maple syrup), and vanilla extract. Use a hand mixer or a whisk to whip it into a smooth, creamy mixture. You want it to be as velvety as a cloud! This creamy goodness is what makes our Nutritious Biscoff Cheesecake Protein Balls so irresistible.
Step 3: Combine Mixtures
Now, it’s time to unite the dry and wet ingredients. Gradually add the creamy mixture to the bowl with the oats and protein powder. Stir gently until everything is fully combined. You want to make sure there are no dry spots left behind. It should look like a thick, delicious dough. And trust me, it’s hard to resist sneaking a taste at this point!
Step 4: Chill the Mixture
Once everything is mixed, cover the bowl with plastic wrap or a lid and pop it in the refrigerator for about 30 minutes. Chilling the mixture makes it easier to handle when you’re forming the balls. Plus, it gives the flavors a chance to meld together, making each bite even more delightful!
Step 5: Form the Balls
After the mixture has chilled, it’s time to get your hands a little messy! Scoop out tablespoon-sized portions of the mixture and roll them into balls. I like to use a cookie scoop for this—it makes the process quick and easy. If the mixture is too sticky, wet your hands slightly to help with rolling. You’ll end up with about 12 delicious protein balls!
Step 6: Coat with Crushed Cookies
Here comes the fun part! Take the extra crushed Biscoff cookies and place them in a shallow dish. Roll each protein ball in the crushed cookies until they’re fully coated. This adds a delightful crunch and extra flavor that takes these Nutritious Biscoff Cheesecake Protein Balls to the next level. Plus, it makes them look super cute!
Step 7: Refrigerate to Firm Up
Finally, place the coated protein balls on a parchment-lined baking sheet. Pop them back in the refrigerator for at least an hour to firm up. This step is essential because it helps the balls hold their shape. Once they’re set, you can enjoy them right away or store them in an airtight container in the fridge for a quick snack throughout the week. Trust me, you’ll want to keep these on hand!

Tips for Success
- Make sure your cream cheese is softened for easy mixing—leave it out for about 30 minutes before you start.
- Use a cookie scoop for uniform ball sizes; it makes the process quicker and neater!
- If the mixture feels too sticky, dampen your hands slightly to help with rolling.
- Store any leftovers in an airtight container in the fridge for up to a week.
- Feel free to experiment with different mix-ins like nuts or dried fruit for added texture!
Equipment Needed
- Mixing bowls: A large bowl for combining ingredients and a smaller one for mixing wet ingredients. Any size will do!
- Whisk or hand mixer: For blending the wet ingredients smoothly. A fork works in a pinch!
- Cookie scoop: Perfect for portioning the mixture. You can also use your hands if you prefer.
- Parchment paper: To line your baking sheet. Wax paper can be a substitute if needed.
Variations
- Chocolate Hazelnut Twist: Swap half of the Biscoff spread with chocolate hazelnut spread for a rich, chocolatey flavor that’s sure to please any sweet tooth!
- Nut-Free Delight: Use sunflower seed butter instead of Biscoff spread to create a nut-free version that’s just as delicious and perfect for school snacks.
- Fruit Fusion: Add in some dried fruits like cranberries or raisins for a chewy texture and a burst of natural sweetness.
- Protein Boost: Mix in a tablespoon of chia seeds or flaxseeds for an extra boost of fiber and omega-3 fatty acids.
- Spiced Up: Add a pinch of cinnamon or nutmeg to the dry ingredients for a warm, spiced flavor that complements the Biscoff beautifully.
Serving Suggestions
- Pair these Nutritious Biscoff Cheesecake Protein Balls with a cup of herbal tea for a cozy afternoon snack.
- Serve them alongside fresh fruit like apple slices or berries for a balanced treat.
- For a fun presentation, arrange them on a decorative plate and sprinkle some crushed Biscoff cookies around.
- These protein balls also make a great addition to lunchboxes for a sweet surprise!
FAQs about Nutritious Biscoff Cheesecake Protein Balls
1. Can I make Nutritious Biscoff Cheesecake Protein Balls ahead of time?
Absolutely! These protein balls are perfect for meal prep. You can make them in advance and store them in an airtight container in the fridge for up to a week. They’ll be ready whenever you need a quick snack!
2. How do I store Nutritious Biscoff Cheesecake Protein Balls?
To keep your protein balls fresh, store them in an airtight container in the refrigerator. If you want to keep them longer, you can freeze them for up to three months. Just let them thaw in the fridge before enjoying!
3. Can I substitute the protein powder?
Yes, you can! If you prefer a different flavor or type of protein powder, feel free to swap it out. Just keep in mind that the taste and texture may vary slightly. Plant-based protein powders work well too!
4. Are Nutritious Biscoff Cheesecake Protein Balls suitable for kids?
Definitely! These protein balls are a hit with kids and make for a great after-school snack. They’re sweet enough to satisfy a craving but packed with nutrients to keep them energized!
5. What can I use instead of Biscoff spread?
If you’re looking for alternatives, you can use chocolate hazelnut spread for a different flavor or sunflower seed butter for a nut-free option. Both will still give you a delicious treat!
Final Thoughts
Creating these Nutritious Biscoff Cheesecake Protein Balls is not just about whipping up a quick snack; it’s about bringing joy to your kitchen and your family. Each bite is a delightful reminder that healthy can be delicious, and you don’t have to sacrifice flavor for nutrition. Whether you’re enjoying them after a workout or sneaking one during a busy afternoon, these little treats are sure to brighten your day. So, roll up your sleeves, gather your ingredients, and let the magic happen. Trust me, once you try them, you’ll be hooked!
Print
Nutritious Biscoff Cheesecake Protein Balls are irresistible!
Nutritious Biscoff Cheesecake Protein Balls are irresistible!
- Total Time: 40 minutes
- Yield: 12 servings 1x
Ingredients
- 1 cup rolled oats
- 1 cup vanilla protein powder
- 1/2 cup Biscoff spread
- 1/2 cup cream cheese, softened
- 1/4 cup honey or maple syrup
- 1/4 cup crushed Biscoff cookies (plus extra for rolling)
- 1 teaspoon vanilla extract
- 1/4 teaspoon salt
Instructions
- In a large mixing bowl, combine the rolled oats, vanilla protein powder, and salt. Mix well.
- In a separate bowl, blend the Biscoff spread, softened cream cheese, honey (or maple syrup), and vanilla extract until smooth and creamy.
- Gradually add the wet mixture to the dry ingredients, stirring until fully combined. Fold in the crushed Biscoff cookies.
- Refrigerate the mixture for about 30 minutes to make it easier to handle.
- Once chilled, scoop out tablespoon-sized portions and roll them into balls.
- Roll each ball in the extra crushed Biscoff cookies to coat.
- Place the protein balls on a parchment-lined baking sheet and refrigerate for at least 1 hour to firm up.
Notes
- For a chocolate twist, substitute half of the Biscoff spread with chocolate hazelnut spread.
- For a nut-free version, use sunflower seed butter instead of Biscoff spread.
- Prep Time: 10 minutes
- Cook Time: 0 minutes
- Category: Snack
- Method: No-bake
- Cuisine: American
- Diet: Vegetarian
Nutrition
- Serving Size: 1 ball
- Calories: 120
- Sugar: 6g
- Sodium: 50mg
- Fat: 5g
- Saturated Fat: 2g
- Unsaturated Fat: 3g
- Trans Fat: 0g
- Carbohydrates: 12g
- Fiber: 1g
- Protein: 6g
- Cholesterol: 15mg